Start your aquarium right by building a stable biofilter before adding any fish. This proven method uses a measurable ammonia source and bottled bacteria to seed nitrifiers across the tank, filter, and media.
Precise dosing and daily water tests keep nitrite and ammonia below harmful levels while the bacterial community grows. Using products like Dr. Tim’s One & Only and measured ammonium chloride makes the process predictable and fast.
Traditional approaches can take 30–45 days, but a controlled method often finishes in under a week when done correctly. Never exceed 5 ppm; too much can stall beneficial bacteria and harm future fish.
Key Takeaways
- fishless cycle with ammonia.
- Use a measured ammonia source and bottled bacteria to seed a safe biofilter.
- Daily testing keeps nitrite and ammonia under toxic thresholds.
- Proper dosing cuts setup time from weeks to days for many tanks.
- Avoid overdosing; high levels can stall beneficial bacteria.
- Simple tools and products make the method repeatable for beginners.
Why Choose a Fishless Cycle for a Healthy Aquarium
Choosing a humane start for your tank protects future fish and speeds biological stability.
Humane and safer: Using a fish-free approach builds your biofilter without subjecting live fish to toxic spikes. Many hobbyists avoid stress, gill damage, and preventable deaths by feeding bacteria directly instead of risking livestock during setup.
Faster and more predictable than traditional cycling: Bottled bacteria like Dr. Tim’s One & Only combined with measured ammonium chloride dosing can reduce setup time to about a week rather than 30–45 days. Controlling inputs makes the whole process repeatable across any tank size.
Protects future stock: Keep ammonia-nitrogen and nitrite-nitrogen under 5 mg/L to prevent bacterial inhibition and long-term harm to fish you will add later. This controlled route lets you track progress each day and adjust before any animals are introduced.
- Humane way to seed a robust biofilter without sacrificial fish.
- Measured dosing creates steady, stable water chemistry.
- Scales to any tank and sets the stage for healthier fish long-term.
Understanding the Nitrogen Cycle and Nitrifying Bacteria

The path from toxic waste to harmless nitrate is the backbone of a healthy aquarium.
From waste to nitrate: what happens in your water
First, ammonia appears after waste breaks down or when you dose ammonium chloride. Ammonia-oxidizing microbes convert that compound into nitrite.
Next, nitrite rises as those first bacteria establish. Then a second group converts nitrite into nitrate, a less toxic end product that plants and water changes control.
Ammonia-oxidizers and nitrite-oxidizers: the bacteria you need
Nitrifying bacteria are the heart of the biofilter. They grow slowly, so even a fish-free method follows the same biological order.
Use reliable liquid test kits daily to track ammonia nitrite levels and avoid spikes above about 5 mg/L. High levels can stall progress and harm the community you’re cultivating.
- Sequence: ammonia → nitrite → nitrate.
- Two bacterial groups do the work; focus on roles, not only names.
- Nitrate accumulation shows progress and is managed with maintenance.
Fishless cycle with ammonia: the step-by-step method

A clear, repeatable plan makes establishing a biofilter simple and confidence-building.
Prepare the tank: Condition the water to neutralize chlorine and chloramine, heat to 75–78°F, and run the filter for steady circulation. Remove filter socks and pause UV, skimmers, and ozonizers for at least 48 hours after adding bottled bacteria so microbes can attach.
Seed and dose
Add a trusted bottle of nitrifying bacteria per label, such as Dr. Tim’s One & Only. Then dose ammonium chloride at 4 drops per gallon to reach roughly 2 ppm of ammonium‑nitrogen. Reduce your calculated tank volume by about 20% for substrate and decor displacement before dosing.
Targets and daily testing
Keep levels under 5 ppm as a safety cap. Test ammonia and nitrite every day and log results. Watch for nitrite to appear—this indicates ammonia‑oxidizers are active. Expect nitrite to peak, then fall toward zero in about 7 days in many setups.
Validation and next steps
When both ammonia and nitrite read near zero after a 2 ppm dose and the system clears that level within 24 hours, repeat the validation dose once more. If successful, do a partial water change, restore normal equipment, and begin slow stocking of fish.
- Condition and heat the water.
- Seed bacteria and dose ammonium chloride.
- Test daily until nitrite falls and both values clear.
Your testing toolkit and target water parameters
A reliable testing routine helps you read the tank’s progress every day. Accurate readings let you steer the method and protect future fish.
Liquid test kits for ammonia, nitrite, and nitrate
Choose a trusted liquid test kit set that measures ammonia, nitrite, and nitrate. Liquid kits give finer color matches than strips and reduce guesswork when bacteria are establishing.
Note: many nitrate kits cannot detect levels below ~20 ppm early on. Expect nitrate to be low or undetectable at first, then rise as the process matures.
Recording results daily to see the cycling pattern
Record every result with date and time in a logbook or simple spreadsheet. Plotting ammonia nitrite values shows the rise, the peak, and the fall — the exact pattern that signals a healthy biofilter turnaround.
- Trustworthy tests: use liquid kits for consistent readings.
- Daily logging: a spreadsheet reveals trends and helps plan the validation dose.
- Consistent technique: sample, light, and timing should stay the same for every test.
- Organize tools: keep bottles, droppers, and syringes ready to make testing quick and repeatable.
For many setups using Dr. Tim’s One & Only plus ammonium chloride, ammonia and nitrite can fall to near zero in about seven days. When that pattern appears, run a 2 ppm stress test and confirm the tank clears it within 24 hours before adding fish.
Dosing ammonium chloride the smart way

Dose deliberately and you’ll build a reliable biofilter that supports healthy fish later.
Start with the 4-drops-per-gallon rule to reach roughly 2 ppm of ammonium‑nitrogen. This amount feeds beneficial bacteria without pushing levels so high they slow growth.
Calculate your actual tank water volume, not the labeled size. Subtract about 20% to account for substrate and decor so you don’t overshoot when you add ammonium chloride.
Practical dosing tips
- Hold the bottle vertical and add drops one at a time for accuracy.
- Use conversions for larger totals: 1 tsp ≈ 100 drops; 1 tbsp ≈ 300 drops.
- If you use live sand (for example CaribSea Arag-Alive), wait 24 hours after setup and test before you dose—it may release extra ammonia and require a reduced initial dose.
Protect the process
Never exceed 5 ppm. High levels can inhibit the very bacteria you want to grow and stall cycling. If you do overshoot, perform an immediate partial water change to return ppm to the safe range.
One step at a time: dose, test, observe, and adjust. Treat this as a precise routine: small, consistent actions in aquarium water mean faster, more reliable results.
For product-specific guidance, see the Dr. Tim’s dosing guide.
Alternative fishless cycling methods compared

There are practical ways to seed beneficial bacteria that range from budget-friendly to highly controlled. Choose the path that fits your budget, goals, and tolerance for surprises.
Fish food and dead shrimp are cheap and easy. Adding food or a single dead shrimp produces ammonia as it decays. Results are unpredictable, though, and you may get cloudy water, strong odor, or bacteria blooms that spike and crash.
Live materials and seeded media
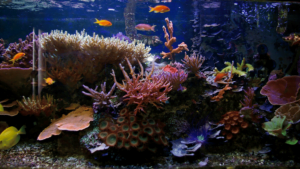
Live plants speed progress in freshwater and use nitrate, making them a great natural accelerator when paired with a bottle of nitrifiers. Live rock or live sand work for marine tanks but must be well-cured to avoid pests.
Seeding with mature filter media is often the fastest shortcut. Transferring media from a healthy system can give near-instant bacterial colonies, but match water parameters and watch for hitchhikers.
- Budget way: fish food — cheap but imprecise; test daily.
- Simple option: dead shrimp — effective, messy, and smelly.
- Controlled method: dose ammonium chloride and a trusted product — cleaner, faster, and repeatable.
Whichever method you choose, consistent testing and disciplined dosing or feeding keep the process smooth and predictable.
Troubleshooting common cycling problems

When your tank won’t progress, a few checks usually reveal the bottleneck. Stay calm and treat each symptom as a clue rather than a crisis.
Stalled nitrite, cloudy water, and bacteria blooms
If nitrite seems stuck, run a fresh test and ensure neither nitrite nor ammonia has passed 5 ppm. High levels inhibit nitrifying bacteria and slow progress.
Cloudy water often follows decaying organics like shrimp. It usually clears, but switch to measured dosing to avoid repeat blooms.
High nitrate or overshot levels: when to do a water change
If nitrate or other levels spike from repeated heavy dosing, perform a partial water change to reset the system. Timely water change keeps bacteria healthy and prevents setbacks.
UV, skimmers, and socks: equipment to pause during seeding
Turn off UV, skimmers, and remove filter socks for at least 48 hours after adding bottled bacteria. These devices can strip bacteria from aquarium water before they colonize the filter and media.
“Dose less, test more, and let the biofilter catch up.”
- Test daily and log results to spot stalls early.
- Improve mechanical filtration after the initial seeding window.
- Check heater and flow so oxygen supports bacterial growth.
After the cycle: water change and adding fish gradually
Confirm readiness first: validate your biofilter by dosing about 2 ppm and using a liquid test kit. If both ammonia nitrite readings drop to near zero within 24 hours, the tank is ready for life.
Verifying zero ammonia and nitrite within twenty-four hours
Run the 2 ppm validation and log results. If both ammonia and nitrite read near zero at the 24-hour mark, you have a functioning bacteria population that can handle low initial bioloads.
Stocking in stages and maintaining nitrates with water changes
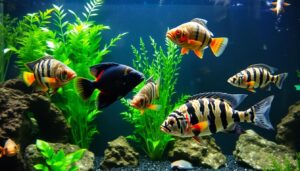
Start slow: add fish in small groups (2–3 at a time) and wait at least two weeks between additions. This gives bacteria time to grow as the tank’s waste increases.
- Validate: test for zero ammonia and nitrite before every new addition.
- Control nitrate: keep nitrate below ~20 ppm with regular water change schedules.
- Feed light: modest feeding reduces spikes and helps the filter keep up.
- Support bacteria: maintain stable temperature, good aeration, and rinse media only in tank water.
“Steady, deliberate steps now build a thriving aquarium for the long term.”
Conclusion
A focused, measured approach turns startup guesswork into a clear, repeatable routine for any tank.
Measure, dose, test: that simple path builds a complete biofilter without risking fish. Use bottled bacteria (for example Dr. Tim’s One & Only) and a controlled ammonium chloride dose (about 4 drops per gallon ≈ 2 ppm) to speed the cycling process.
Keep nitrite and ammonia below 5 ppm, pause UV and skimmers for 48 hours after adding bacteria, and validate by processing a 2 ppm stress dose to near zero in 24 hours before stocking slowly.
This method saves time and stress by making the cycling process data-driven. Thriving bacteria are the engine of long-term stability—feed them precisely and they’ll protect your fish and filter for years.
Choose the way that fits your goals: controlled dosing and bottled cultures for repeatability, or alternative methods when they suit your budget. Test daily, stay patient, and your aquarium will reward steady care.
FAQ
What is a fishless cycling method using ammonium chloride?
How do I know how much ammonium chloride to add?
Which test kits should I use during the process?
How often should I test the water during the setup?
Can I use bottled nitrifying bacteria to speed things up?
What mistakes commonly stall the process?
How long does this method typically take?
Is using fish food or frozen shrimp a valid alternative?
When is it safe to add fish or shrimp after finishing?
Should I do a water change at the end, and how much?
Can live plants or seeded media replace the need for dosing?
What equipment should I avoid during bacterial colonization?
How do I handle a spike in nitrite or nitrate during the process?