Starting a small community aquarium is an exciting and relatively easy way to get into the hobby. Choosing the right fish and understanding how adult size and temperament affect compatibility are the first steps to a thriving setup. Many species are well-suited for smaller tanks, but note that very small systems (like 5-gallon tanks) limit your choices and require extra attention to water quality and stocking.
This guide covers practical tank setup, how to pick compatible fish, and the maintenance habits that keep a healthy freshwater aquarium. Whether you’re planning a 5‑gallon nano or a 20‑gallon community tank, you’ll get clear steps, species suggestions, and real-world tips to create a balanced, attractive display.
Follow this guide to set up your first community aquarium confidently—whether you’re looking for a peaceful display of schooling fish or a mixed community with bottom dwellers. The sections below explain setup essentials, choosing friendly species, acclimation, maintenance, and when to upgrade as your skills grow.
Key TakeawaysPick fish that will fit your tank at full adult size to avoid overcrowding.
Focus on species that thrive in small community setups and get along well together.
Proper setup and regular maintenance are essential—especially in smaller tanks where conditions change more quickly.
Compatibility (size, temperament, and water needs) prevents conflict and stress among community fish.
If you want a relatively easy start, choose hardy freshwater species and follow step-by-step care guidance in this content.Introduction to Aquarium Fish KeepingKeeping a community aquarium is a rewarding hobby that combines creativity, responsibility, and the simple pleasure of watching aquatic life thrive. Whether you’re attracted to the bright colors of tropical fish or the calm of a planted freshwater display, a well-planned fish tank can fit many lifestyles and living spaces.
A community aquarium is a tank stocked with multiple compatible fish species that coexist peacefully — typically a mix of schooling mid‑water species, peaceful top swimmers, and bottom dwellers. Choosing the right species is the foundation: many beginners find livebearers like guppies to be one popular, hardy option because of their small adult size and adaptability. However, remember that nano tanks (5–10 gallons) limit options and need stricter water quality control.
Proper care and routine water testing sustain a healthy environment. Local fish stores are valuable allies — ask them about water testing services, current stock levels, and species compatibility for the tank size you’re planning. If you’re just starting, look for hardy freshwater species and merchandise labeled “community” or “beginner‑friendly.”
What begins as a casual interest can become a year‑round commitment to learning and improving your setup. From selecting compatible fish to mastering basic maintenance, the process is educational and enjoyable. If you’re looking for an in-depth, step-by-step walkthrough, see this step-by-step resource to get started.
Setting Up Your Aquarium for SuccessCreating a thriving aquatic display begins with choosing the right tank and arranging the proper environment. The tank you pick affects water stability, filtration needs, and how comfortably your fish can live and grow. Thoughtful selection and setup reduce stress on livestock and make routine maintenance easier.
Selecting the Right Tank Size and Environment
The size of your tank directly influences water chemistry and fish growth. For many beginners, a 20-gallon tank is a practical sweet spot: it’s large enough to support a small community and more forgiving of maintenance mistakes than nano setups. Very small tanks (5–10 gallons) are possible but keep in mind they limit species choices and require more frequent attention to parameters.
Larger tanks dilute pollutants more effectively and provide more stable conditions, which is why many hobbyists upgrade as they gain experience. Always keep the adult size of planned fish in mind when calculating stocking — small fish in number can still create a heavy bioload.
Essential Equipment and Water Parameters
Equip your fish tank with reliable basics: a filter sized to your tank’s flow needs, a heater appropriate for the volume and target temperature, a test kit, and lighting suited to your décor or plants. Rather than relying on a single rule, think in terms of flow and turnover: aim for a filter capable of roughly 3–5× the tank volume per hour (for many community setups, 4× is a good target). For example, for a 20-gallon tank aim for a filter that moves ~80 gallons per hour.
Heater sizing is a guideline — older rules of thumb suggest about 5 watts per gallon, but modern heaters and well‑insulated tanks can vary. Use the wattage suggestion as a starting point and monitor water temperature with a reliable thermometer to fine-tune.
Consistent water testing is vital: track ammonia, nitrite, nitrate, and pH during startup and regularly after stocking. Cycling a new tank builds beneficial bacteria and is essential before adding fish. While a natural cycle can take several weeks to a few months, using seeded media, filter media from an established tank, or commercial bacterial starters can shorten the process. You’ll know the cycle is complete when ammonia and nitrite test at 0 ppm and nitrate is detectable.
Must-Have Setup ChecklistTank sized for your planned stocking (20 gallons recommended for most beginners)
Filter rated for 3–5× turnover per hour (example: ~80 GPH for 20 gallons)
Appropriate heater and reliable thermometer
Water test kit (ammonia, nitrite, nitrate, pH)
Substrate (consider 1.5–2 lb per gallon as a general guideline for gravel; adjust for planted/sand setups)
Dechlorinator and basic maintenance tools (siphon, algae scrub)For a step-by-step setup walkthrough and product suggestions, see this step-by-step resource. Download our setup checklist to guide your first installation and keep important specs handy while you plan.
Choosing Friendly Fish for Your Community AquariumSelecting the right aquatic companions is essential to building a peaceful, visually appealing community fish tank. The best combinations balance color, size, and temperament so that all inhabitants can get along and display natural behavior. Keep in mind your tank’s dimensions and the adult size of each fish when planning a stocking list.
Color, Size, and Temperament Considerations
Vibrant species like the neon tetra add instant color to a setup, while patterned mid‑water swimmers create movement and interest. However, aesthetics must be balanced with practicality: always check adult size to avoid overcrowding — many tetras reach roughly 1.2–1.8 inches, making them ideal for smaller tanks when kept in groups.
Temperament matters just as much. Peaceful community fish such as corydoras or platies are beginner‑friendly and tend to coexist quite well with schooling mid‑water species. Avoid mixing known fin‑nippers or territorial species with long‑finned or timid fish.
Understanding Fish Compatibility in a Community Tank
Compatibility is largely about matching size, water requirements, and temperament. Small, non‑aggressive species are generally safer together; for example, tetras and guppies can get along because both are small and peaceful, but be sure their temperature and pH needs overlap.
Group dynamics are important: many schooling fish show their best colors and behavior when kept in groups. Typical minimums to keep in mind: neon tetras — 6–8, rasboras — 6+, and corydoras — 4–6. Groups reduce bullying and help fish feel secure.
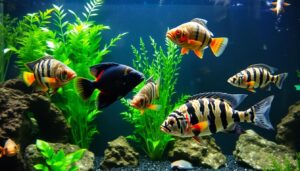
Recommended Small‑Tank Pairings (compatibility matrix)Neon tetra + Corydoras + Small livebearer (e.g., guppy) — good for a 20-gallon community tank; schooling + bottom cleaners + colorful browsers.
Pearl danios or celestial pearl danios + Otocinclus + small rasbora — peaceful schooling community for nano to small tanks.
Platy + Corydoras + 6 small tetras — hardy, colorful community with varied levels occupied (top, middle, bottom).Red Flags & Quick Compatibility ChecklistFin‑nippers (some barbs) — avoid with long‑finned species.
Large predatory or territorial species — don’t mix with small schooling fish.
Mismatched water needs — temperate goldfish vs. tropical species is a no‑go.
Single schooling species kept alone — always keep at least the species’ recommended minimum group size.When planning, research each species’ adult size, temperament, and specific water parameters. Prioritize peaceful community fish and smaller fish that get along, and you’ll build a harmonious display that’s enjoyable and stable.
For more pairings and a printable compatibility chart, see the full fish compatibility chart.
Freshwater Tropical, Coldwater, and Marine Options ExplainedChoosing between freshwater tropical, coldwater, or marine systems determines the types of fish you can keep, the equipment you’ll need, and the ongoing commitment required. A small freshwater community is often the most accessible path for beginners, while marine tanks offer a wider visual range of species but bring greater complexity and cost. Understanding these differences will help you pick the best match for your space and schedule.
Pros and Cons of Tropical and Coldwater Fishes
Freshwater tropical setups are popular because they support a huge variety of colorful fish — neon tetras, rasboras, and many livebearers provide vivid movement and pattern. Tropical systems usually require consistent water temperatures (commonly in the 72–82°F range for many tropical community species), so plan to include a reliable heater and thermometer.
Coldwater tanks are sometimes simpler to run because they don’t require a heater for typical room temperatures, but that doesn’t mean they’re lower maintenance. Goldfish, a common coldwater choice, grow large and produce a heavy bioload, so they need much larger tanks than many beginners expect — they are not ideal for small 10–20 gallon setups despite being coldwater species.
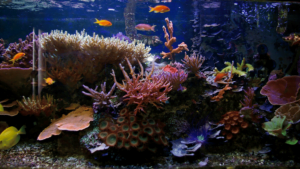
Starter Marine Fish Recommendations
Marine aquariums display an incredible range of color and behavior, but saltwater systems demand stricter parameter control and additional equipment (protein skimmers, dosing systems, and accurate test kits). If you’re drawn to saltwater, consider starting with hardy, one popular beginner species such as clownfish or damselfish in a properly sized tank. Note that many marine hobbyists recommend starting with a 30+ gallon tank rather than very small nano systems to improve stability; nano marine tanks are possible but require advanced attention to water chemistry.
Quick Pros & ConsFreshwater community: Relatively easy to start, wide variety of fish, good for small tanks when you choose smaller species.
Coldwater: No heater needed in many homes, but species like goldfish need large tanks and produce more waste.
Marine: Stunning diversity and colors, but higher complexity, cost, and equipment needs; better suited to hobbyists prepared for precise care.If you’re looking for straightforward success, a freshwater aquarium stocked with hardy, community‑minded species is often the best first choice. For deeper reading on which species fit each system, see this detailed guide and consider taking a short quiz to decide which tank type fits your lifestyle.
Popular Species for Beginner Aquarists
Diving into the world of aquatic pets offers endless opportunities for learning and enjoyment. Selecting the right species is the single most important decision for creating a thriving, low‑stress community. Below are beginner‑friendly fish that combine bright color, peaceful behavior, and relatively easy care.
Top Freshwater Fish Selections
These species are widely recommended for new hobbyists because they tolerate a range of conditions and are forgiving of small mistakes. Pay attention to adult size and group requirements when planning stocking for your tank.
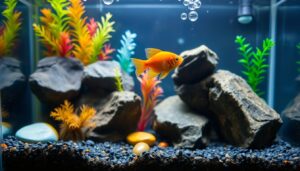
Guppy
Guppies are one popular choice for beginners — colorful, small (about 1–2 inches), and hardy. Ideal tank: 10–20 gallons. Temperature: 72–82°F. Temperament: peaceful; do well in community tanks. Diet: flakes, frozen foods. Note: they breed easily — control numbers if you don’t want fry.
Platy
Platies are peaceful, easy care community fish that add bright color. Adult size: ~2–3 inches. Ideal tank: 20+ gallons. Temperature: 70–77°F. Temperament: calm and social. Diet: omnivorous — flakes and vegetable matter.
Molly
Mollies adapt to various water conditions and make hardy community members. Adult size: up to ~4–5 inches depending on variety. Ideal tank: 20+ gallons. Temperature: 72–78°F. Temperament: peaceful but can be slightly more active than platies. Note: some varieties prefer slightly higher hardness and salinity.
Livebearers, Tetras, and Corydoras Highlights
Combining mid‑water schooling fish with bottom dwellers creates a dynamic, balanced display that fills different levels of the aquarium.
Neon Tetra
Neon tetras are classic schooling schooling fish with vivid color. Adult size: ~1.2–1.8 inches. Keep in groups of 6–10 or more for best color and behavior. Ideal tank: 10–20 gallons (20+ preferred for larger groups). Temperature: 70–78°F. Temperament: peaceful; excellent for smaller community tanks.
Corydoras (Cory Catfish)
Cory catfish are ideal bottom tank cleaners and a peaceful community addition. Adult size: 1–3 inches depending on species. Keep in groups of 4–6+. Ideal tank: 10–20+ gallons. Diet: sinking pellets, wafers, and occasional frozen foods. They help keep substrate clean and display active social behavior.
Pearl Danios / Celestial Pearl Danios
Pearl danios and celestial pearl danios (smaller pearl types) are great for nano and small tanks due to their small size and schooling nature. Keep in groups of 6+. Ideal tank: 10–20 gallons. Temperament: peaceful and active; excellent in peaceful community setups.
Small Community Stocking Ideas20-gallon community: 6 neon tetras + 4 corydoras + 3 platies — occupies top, middle, and bottom levels.
Nano peaceful tank (10 gallons): small group of celestial pearl danios + 3–4 otocinclus (if tank is well cycled and planted).
Beginner easy-care mix: guppies + corydoras + a small school of rasboras — hardy and visually varied.Warnings & Practical TipsLivebearer overpopulation: guppies and platies breed readily — plan for population control (separate breeding tank, remove fry, or keep only males).
Avoid pairing fin‑nippers with long‑finned species (e.g., some tiger barbs with fancy guppies).
Match temperature and pH preferences when pairing species — compatibility is more than temperament.“Choosing the right mix of species ensures a balanced and harmonious environment.”For a printable list of the best community species and quick compatibility checks, see the full guide on best freshwater fish. With thoughtful selection and proper tank sizing, even beginners can maintain a colorful, peaceful community aquarium.
Expert Tips on Fish Introduction and AcclimationIntroducing new fish to your community tank is a critical moment — done right, it minimizes stress and disease risk; done poorly, it can cause major setbacks. Take your time, follow a reliable acclimation routine, and consider quarantining new additions when possible to protect your established stock.
Steps to Properly Acclimate New Fish
1) Float the sealed bag in the tank for 15–20 minutes to equalize temperature. 2) Open the bag and, every 5 minutes, add a small cup of tank water to the bag (or use a slow drip) to gradually match water chemistry. Continue this for 45–60 minutes. 3) After parameters are close, gently net the fish and release them into the tank — avoid dumping bag water into your display to reduce risk of contamination.
Monitor behavior closely for the first 24–48 hours. Signs like clamped fins, rapid gill movement, or erratic swimming indicate stress or incompatible conditions and may require water parameter checks or temporary isolation.
Quick Acclimation ChecklistTemperature equalized (15–20 minutes)
Drip or cup acclimation for 45–60 minutes
Net and release — do not add bag water
Observe for 24–48 hours; check filters and water parameters if stress appearsQuarantine and Alternatives
Quarantining new additions for 7–14 days in a separate tank is the safest way to prevent disease introduction — observe for parasites, fungus, or unusual behavior before adding fish to your main display. If you lack a quarantine tank, be extra cautious with seller hygiene and monitor your main tank more frequently after introduction.
Reducing Stress During Fish Transport
During transport, keep fish in a sturdy, insulated container to maintain stable temperatures. Add a water conditioner (for example, API STRESS COAT™) to protect slime coats. Once home, it’s generally best not to feed new arrivals for 24 hours to allow them to recover from shipping stress and to avoid overloading the biological filter.
Low‑Tech Acclimation Methods
If you don’t have drip tubing, use the cup method: float the sealed bag, then pour small amounts of tank water into a clean container and transfer fish with a net when ready. Another simple way is adding a few tablespoons of tank water into the bag every 5 minutes until acclimated.“Careful acclimation is the key to long-term health and harmony in your tank.”By taking the time to acclimate and quarantining when possible, you’ll give new community fish the best chance to settle in and thrive. For convenience, download our step‑by‑step acclimation checklist PDF to keep near your aquarium during every introduction.
Maintaining a Healthy Aquarium EnvironmentKeeping a stable, attractive tank takes consistent effort but becomes routine once you have a system in place. Regular maintenance protects water quality, reduces disease risk, and helps your fish show their best colors and behavior. Below are practical, easy‑to‑follow practices for weekly, monthly, and seasonal care.
Effective Tank Maintenance and Water Testing
Do basic upkeep weekly: clean the glass, vacuum substrate, and inspect equipment. Substrate recommendations vary by setup — for many gravel tanks, 1.5–2 lb per gallon is a common guideline, but planted or sand tanks require different depths and materials, so keep that in mind when planning.
Water changes are the single most important maintenance task. Replace roughly 15–25% of the water every 1–2 weeks for typical community setups; heavily stocked tanks may need more frequent changes. Always treat tap water with a dechlorinator before adding it to your aquarium.
Test water parameters regularly — at minimum weekly for ammonia, nitrite, nitrate, and pH during new setups and after changes. For established tanks, a consistent rhythm (weekly quick checks, monthly deeper tests) helps catch trends early. Aim for ammonia and nitrite at 0 ppm and keep nitrate low (many hobbyists target under 20–40 ppm depending on species sensitivity).
Maintenance Calendar (quick view)Daily/Every other day: quick visual check — fish behavior, filter running, heater/temp stable.
Weekly: 15–25% water change, glass cleaning, gravel vacuum, empty skimmer cup (if used).
Monthly: clean filter media (in tank water), check equipment, full parameter test, replace light bulbs as needed.Essential Dietary and Care Practices
A balanced diet is central to health. Feed small amounts twice a day, offering only what your fish can eat in about five minutes. Overfeeding leads to excess waste, poor water quality, and extra work. Use high‑quality staples (flakes or pellets) supplemented occasionally with frozen or live foods tailored to species.
Bottom dwellers such as catfish (corydoras, larger catfish, and plecos) are valuable for algae control and substrate cleaning. Feed catfish sinking pellets or algae wafers and include some vegetable matter for species that require it. Keep catfish in appropriate group sizes and tank conditions — they often prefer softer substrate and plenty of hiding spaces.
Monitor fish size and behavior over time. Juveniles may need more frequent feeding than adults; adjust portions and frequency as fish grow. Record measurements or photos occasionally to track growth and spot health issues early.“Consistent maintenance and proper care are the foundation of a thriving aquatic ecosystem.”By following a simple calendar and testing routine, you’ll keep water and conditions stable so your community tanks remain healthy and attractive. Want a ready plan? Download our 30‑day aquarium maintenance planner to get started with step‑by‑step tasks and checklists.
Advanced Guidance for Future Tank Upgrades
Upgrading your aquatic setup is a natural next step as your skills and ambition grow. Larger tanks give your fish more space to swim, improve water stability, and open up a wider range of species and aquascape possibilities. Thoughtful planning reduces stress on livestock and makes the transition smooth for both you and your aquatic community.
When and How to Expand Your Aquarium
Signs it’s time to upgrade: frequent territorial disputes, visibly crowded swimming space, or water quality that’s hard to maintain despite regular care. Moving up to a bigger size — for example, from a 20‑gallon to a 40‑gallon — often solves these issues because increased volume dilutes waste and provides more stable conditions.
Plan equipment changes ahead: a larger tank will need a filter and heater rated for the new volume and possibly a stronger circulation system. When planning filtration, factor flow (turnover) and biological capacity rather than relying on simple “filter size” labels.
Step‑by‑Step Upgrade ChecklistMeasure the space and confirm stand/room support and access for maintenance.
Budget for a stronger filter, heater, and any new lighting or stands.
Cycle the new tank before moving fish — use biomedia or filter media from your current tank to seed beneficial bacteria and speed up cycling.
Move livestock in stages: transfer non‑territorial schooling fish first, then bottom dwellers, and finally larger or territorial adults to reduce stress.
Monitor water parameters closely for several weeks after the move and be prepared to perform extra water changes as the new system stabilizes.Mini Case: Upgrading from 20 to 40 Gallons (Practical Timeline)
Week 0: Set up the 40‑gallon with substrate, heater, filter, and decor; seed with existing filter media and start cycling. Week 1: Add plants and check daily parameters; perform small water changes if ammonia/nitrite spikes. Week 2: If ammonia and nitrite are at 0 ppm and nitrate is present, start moving peaceful schooling fish over in small groups. Week 3–4: Introduce bottom dwellers and any remaining species, observing interactions and water chemistry closely; plan equipment tweaks if needed.
Balancing Older Adults with New Additions
When adding smaller or younger fish to a tank with established adults, pay attention to temperament and feeding competition. Some adult species may not accept much smaller fish — angelfish, for instance, may not coexist quite well with tiny tetras when hungry or territorial. Introduce new fish slowly, provide hiding places, and consider using feeding rings or target feeding to ensure juveniles get food.“A well-planned upgrade enhances both the health and beauty of your aquatic ecosystem.”If you’re ready to expand, use an upgrade planner to map space, costs, and a staged transfer timeline. Upgrading your community tank is rewarding — it increases stability, gives fish more room to express natural behavior, and opens the door to new species and aquascaping ideas for committed hobbyists.
Conclusion
Building a thriving community aquarium starts with the right knowledge, equipment, and patience. From selecting compatible fish to sizing and setting up a balanced tank, each decision affects long‑term success. Maintain stable water conditions with a simple testing routine and a consistent maintenance plan to keep your aquatic companions healthy and vibrant.
Visit a local fish store to see live examples of species like livebearers or catfish, ask about current stock and water testing services, and get product recommendations tailored to your tank size. A well‑kept aquarium is more than a hobby — it’s a living ecosystem that brings relaxation and ongoing learning.
Remember: success comes with time and attention to detail. Whether you’re starting with a small nano or planning to expand to larger community tanks, use the step‑by‑step guidance in this guide to build confidence and avoid common mistakes. If you’re looking for quick next steps, download the setup checklist, the 30‑day maintenance planner, and the species compatibility chart to plan your first stocking.FAQWhat size tank is best for beginners?
A 20‑gallon tank is a practical starting point for many beginners — it offers stable water conditions and room for a small community. Very small tanks (5–10 gallons) are possible but limit species choices and require closer attention.
Which fish are easy to care for in a freshwater tank?
Guppies, platies, neon tetras, and corydoras are commonly recommended for beginners. They are hardy, adapt well to community setups, and are known for being relatively easy to keep.
How do I choose compatible fish for my aquarium?
Match size, temperament, and water requirements. Prioritize peaceful community fish and schooling species, keep recommended group sizes (for example, neon tetras and pearl danios in groups of 6+), and avoid mixing aggressive species with smaller, timid fish.
What equipment is essential for a beginner’s aquarium?
A reliable filter, heater (for tropical setups), lighting, and a test kit for pH, ammonia, nitrite, and nitrate are must‑haves. Choose equipment rated for your tank’s volume and aim for appropriate filter turnover for community tanks.
How often should I test water and perform maintenance?
Quick checks for behavior and equipment daily. Test key parameters (ammonia, nitrite, nitrate, pH) weekly during and after setup; once stable, keep a regular rhythm (weekly spot checks, monthly in‑depth testing). Perform 15–25% water changes every 1–2 weeks depending on stocking and observed water quality.
Can I keep goldfish in a tropical tank?
No — goldfish are coldwater species and prefer cooler temperatures. They also produce a heavy bioload and need much larger tanks than similarly sized tropical fish.
What are the benefits of livebearers like mollies and platies?
Livebearers are hardy, colorful, and often one of the best community choices for beginners. Keep in mind they breed readily — plan for population control if you don’t want fry.
How do I acclimate new fish to my aquarium?
Float the sealed bag for 15–20 minutes to equalize temperature, then add small amounts of tank water over 45–60 minutes (cup or drip method). Net and release fish into the tank; observe them for 24–48 hours for signs of stress.
When should I consider upgrading my tank?
Consider an upgrade if your fish appear crowded, water quality is hard to maintain, or you want to keep a wider range of species. When upgrading, cycle the new tank (seed with biomedia from your current tank), transfer fish gradually, and monitor water parameters closely.
If you’re ready to get started, pick a practical tank size for your space, choose peaceful community fish freshwater species that match each other’s needs, and plan slow, careful introductions. With consistent care and time, your community aquarium will become a rewarding, living centerpiece....