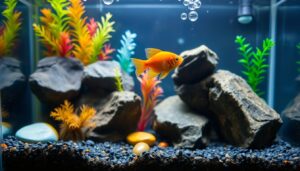
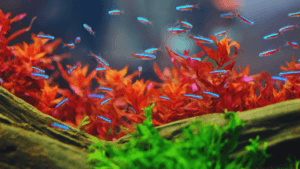
Save money and take control of every ingredient in your tank’s meals. This short guide shows how one simple homemade fish food recipe turns into weeks of convenient, high-protein portions that thaw quickly and feed all tankmates.
In a single prep session you’ll learn two practical methods that produce uniform pellets and flat slabs. Both formats are easy to label, break into consistent portions, and store so your daily feeding routine takes less time and keeps water clearer.
Combine lean proteins (salmon, white fish, or shrimp) with algae and a binder to balance fats, pigments, and minerals. The aim is predictable nutrition and steady acceptance at feeding, without oversized chunks or soggy mixes.
Two proven approaches—a frozen processor mix for fast batching, and high-protein gel pellets for precise texture and sinking/floating control—let you pick what fits your kitchen and schedule. By the end you’ll have batch, label, and rotate routines that save minutes each feeding.
Key Takeaways
- One practical homemade mix yields weeks of ready portions—batch once, feed in minutes.
- Use a protein base plus algae (spirulina/chlorella) and a simple binder to hit nutrition and color goals.
- Pick frozen-processor slabs for speed or gel pellets for consistent sinking/floating and portion control.
Why Make Fish Food at Home Today
One afternoon of prep can turn bulk ingredients into weeks of ready portions, saving money and giving you control over what goes into every meal. This advice is aimed at community aquarium keepers (freshwater and hardy marine species) who want consistent nutrition, portion control, and clearer water without daily kitchen work.
Save money while feeding a varied, balanced diet
DIY batching cuts costs compared with buying many small frozen packs. For example, a 1 lb batch stretched into thin slabs can provide dozens of 1/2‑cup equivalent servings for multiple tanks — the exact yield depends on your recipe and portion sizes. Flattened, labeled bags store well and make break-off portions predictable for weeks.
Cut prep time and keep dinners “ready in minutes”
Consolidate prep into one short session and your daily routine becomes truly ready in minutes. Frozen slabs or pre-made pellets thaw quickly, deliver consistent portions, and reduce cabinet clutter and decision fatigue.
- Lower cost: collapse many branded packs into one balanced homemade blend.
- Full control: choose clean proteins, algae, binders, and boosters so the ingredients match your stock’s needs.
- Simplify care: labeled bags make vacation feeding and caretakers’ jobs straightforward.
- Scalable: start with an easy mix and refine with premium proteins like salmon or shrimp for special batches.
Understanding Your Fish: Herbivores, Omnivores, Carnivores
Identify mouths and feeding habits first. Match particle size and texture to species so grazers, midwater feeders, and bottom dwellers all access their share. Small mouths need micro or suspended bits; larger mouths accept coarser chunks.
Categorize your stock—herbivores need more plant matter and algae, omnivores do well on balanced blends, and carnivores benefit from denser meat-based mixes. A common target for growth-focused mixes is ~55–65% protein by dry weight, but tailor that range to species (herbivores need much less). Use clean protein sources such as canned salmon, white fish, shrimp, or krill meal and add algae (spirulina/chlorella) for pigments and micronutrients.
- Particle and texture: design mixes to suspend or sink at the rate your target species can feed.
- Meat choices: canned salmon, lean fillets, and shrimp give concentrated amino acids without fillers.
- Keep it simple: a core meat plus algae base is easy to adjust for juveniles or breeding adults.
Avoid problematic ingredients that can reduce appetite or foul the tank—for example, strong brassicas and fresh spinach are poor choices for many species, and garlic is not a reliable appetite booster in aquaculture. Observe feedings and refine the next batch. For more on feeding types, see omnivores, herbivores, and carnivores.
Tools You’ll Need in the Kitchen
Make batching simple by gathering a few reliable tools before you start. A tidy station saves minutes and keeps flavor clean during cooking and prep.
Core gear: a sturdy food processor for clean chopping of semi‑frozen ingredients (no added liquid) and a high‑speed blender for gel mixes or fine purees when binders must be smooth. A good digital scale, a bench scraper, and candy molds or flat trays complete the kit.
Use zip‑top bags pressed flat for space‑saving freezer storage. Thin slabs or candy molds make uniform cubes that thaw in minutes and distribute well in the display.
“Process semi‑frozen components with no added liquid to maintain texture and portion easily.”
- Label bags with date, particle size, and target species.
- Dedicate a cutting board and knives to seafood-only prep for hygiene and flavor protection.
- Thaw portions in a small cup of tank water — avoid microwaves that change texture.
Stage bowls for meats, algae powders, binders, and oils. Keep a marker and tape by the freezer and plan zones for everyday slabs versus special blends. Turn off the return pump during feeding to keep portions in the display for better uptake.
Smart Ingredient List for a Nutritious Base
Build a reliable base by choosing a few nutrient-dense ingredients that scale easily for weekly batches. Keep the list focused so every batch meets protein and pigment goals with minimal fuss.
Starter recipe template (one-line)
Base: 1 lb meat (450 g) + 1–2 oz (28–56 g) algae powder + 1.5 oz (≈42 g) gelatin in 1 cup (240 ml) hot water — yields thin slabs you can freeze and portion.
Proteins to start with
Use a high-protein core: canned salmon, white fillet cuts, shrimp, squid, or krill meal. One practical batch uses 1 lb (450 g) meat — canned salmon is a convenient option.
Plant matter and pigments
Add 1–2 oz (28–56 g) dry algae powder (spirulina or chlorella) for micronutrients and color. For herbivores, mild veg like peas, green beans, or zucchini works better than strong brassicas.
Binders and boosters
Dissolve ~1.5 oz (≈42 g) powdered gelatin in 1 cup (240 ml) boiling water for gel pellets; agar or pectin are firmer vegetarian alternatives (adjust quantities per product). Stir in 1/4 tsp astaxanthin for red/orange tones.
- Juveniles: add 1/4 tsp steamed bone meal and 3 tbsp cod liver oil per pound of base only if your primary protein lacks bones/oils — consult species-specific guidance for vitamin A limits.
- Avoid fresh spinach and strong brassicas; they can reduce acceptance and foul water.
- Keep the mixture simple—fewer, better ingredients give predictable results and save prep time.
Quick practical note: metric conversions are included above; check gelatin bloom strength on the packet and treat ratios as a starting guideline. One starter batch (1 lb base) typically yields enough to feed a small community tank several weeks when portioned thinly into 1/2‑cup equivalents.
fish food recipe: Two Proven DIY Methods
Choose the method that fits your kitchen and schedule: a quick chop-and-freeze processor mix for everyday feeding, or a hot gel technique for precise texture, shape, and sinking/floating control. Both aim to produce portions that are ready in minutes after thawing.
Frozen mixed cubes with the food processor
Method A (chop & freeze) uses a food processor to pulse semi‑frozen ingredients with no added liquid, then freeze as thin slabs or cubes for fast thawing.
Flatten the mix into labeled, flat bags or molds so portions break off fast. Thaw small portions in a cup of tank water to disperse pieces evenly during dinner or quick feeding.
High-protein gel pellets and slabs
Method B (hot gel) blends 1 lb meat (salmon works well) with 1–2 oz algae powder and a dissolved binder, then shapes and chills into slabs or pellets for consistent density and portioning.
Blend hot to a glossy putty, spread 1/8-inch slabs or pour into candy molds. If you need floating pieces, test air‑entrainment techniques carefully and consider safer, aquarium-friendly methods (see notes).
“Both methods rely on whole seafoods and algae to deliver concentrated protein without fillers.”
- Choose A for a fast, economical mixture you can portion in minutes.
- Choose B for tidy pellets, predictable sinking/floating characteristics, and higher protein density per portion.
- Rotate methods to vary texture and keep appetite high across species.
Method A: Frozen Processor Mix for Everyday Feeding
Start by staging chilled proteins and algae so blades cut cold pieces instead of making mush. Proper staging keeps texture consistent and saves prep time.
Step-by-step: chop, pulse, and portion without adding liquid
Everything goes into the food processor while semi‑frozen. Pulse in short bursts until you reach the desired particle size.
- Stage semi‑frozen meats (shrink‑wrapped shrimp, canned salmon, or fillet trimmings) and algae powder so blades produce clean bits.
- Pulse, stop, and check often to avoid over‑processing into a paste.
- Split the mixture by particle size—coarse for big mouths, fine for small species—and label bags clearly.
- Spread the mix thin in ziplock bags or molds so it freezes fast and breaks into predictable cubes or slabs.
- Thaw a small 1/2‑cup serving in a cup of tank water for a minute or two before feeding so particles disperse evenly.
Pro tip: process semi-frozen for uniform texture
Keep bowls cold and work quickly. Use a dedicated spatula to scrape every last bit into bags or molds. With practice this method takes minutes and becomes a weekly routine that preserves protein and reduces waste.
Method B: Homemade Gel Fish Pellets with Gelatin
Make a hot, glossy putty and you’ll shape uniform pellets that thaw in minutes. This hot-mix technique locks protein and pigment into a firm, clean matrix you can portion reliably.
Starter ratios for a high-protein batch (guideline): 1 lb (450 g) meat + 1–2 oz (28–56 g) algae powder (spirulina/chlorella) + ~1.5 oz (≈42 g) gelatin dissolved in 1 cup (240 ml) boiling water — adjust binder amounts with gelatin bloom strength or use agar/pectin per product instructions.
Hot-mix technique
Warm the meat and algae until hot but manageable. Stir the dissolved gelatin into the hot mix and blend to a glossy, viscous putty. If the mixture seems too stiff, add a few teaspoons of hot water to loosen it.
Shaping and set
Spread the putty into 1/8‑inch (≈3 mm) slabs on labeled zip bags for the fastest thaw. Use candy molds for neat cubes or shapes that portion consistently into the aquarium.
Notes on floating pellets
Some keepers use micro‑foam or trapped air to create buoyancy, but adding dairy (like whipped cream) can risk water quality—test on a small batch in a quarantine cup first. Safer options include adjusting binder ratios (lighter gel) or incorporating inert, food‑safe microbeads designed for aquarium use. Always test buoyancy in tank water and watch clarity.
“Blend hot for a glossy, viscous putty that sets cleanly and holds together in the tank without clouding.”
- Measure carefully: a 1 lb base with 1–2 oz algae hits protein and pigment targets for growth and color in many omnivores/carnivores.
- Set control: adjust gelatin or agar amounts to change firmness and thaw time.
- Thin slabs: 1/8‑inch sheets thaw fast and break into consistent portions for dinner or quick feeding.
Shaping, Sizing, and Texture That Fish Eat Every Time
How you cut and distribute matters more than the mix — split textures so all tankmates eat well. Large hunks of gel or frozen portions are often taken by dominant swimmers. Chop and spread portions so particles reach shy mouths across the aquarium.
Match particle size to mouths. Prepare micro, small, and medium bits from thin gel slabs so fry, tetras, cichlids, and big mouths each get a fair share. Use thin slabs (1/8-inch) for slicing into uniform cubes or bits that thaw in minutes.
Keep a few bags of ultra-fine puree for small-mouthed species and grow-out projects. Save larger morsels for big cichlids and catfish, but pair those with suspended particles so midwater feeders and shy grazers also get food.
- Cut slabs into micro, small, and medium bits for wide coverage every time.
- Break clumps in-tank and use the current to carry particles across the full footprint.
- Rotate white fish and mixed-seafood batches to change chewiness and scent and keep interest high.
- Use scissors or a bench scraper to size portions before thawing for clean cuts.
- Note which textures spark activity and adjust so many mouths are involved.
“Observe who dominates and tweak sizes or feeding locations to make dinner fair and lively.”
Customize by Life Stage and Goal
Tailor each batch to the age and goal of your stock so every portion serves a clear purpose. Small, deliberate tweaks let one core fish food mixture cover growth, breeding, or maintenance without extra complexity.
Juveniles
Grow youngsters faster and sturdier. For juveniles, increase available calcium and healthy fat carefully: for a 1 lb (450 g) base you might add 1/4 tsp steamed bone meal and ~3 tbsp (45 ml) cod liver oil — but only if your primary protein lacks bones/oils. Consult species-specific guidance; vitamin A in cod liver oil can accumulate if overdosed.
Skip these extras if your canned salmon already includes bones and natural oils.
Breeding stock
For spawners, increase energy stores by targeting roughly 10–15% fat (dry weight). Use richer meats (salmon, beef or chicken heart in small amounts) or measured oils to hit the target; keep portions controlled to avoid excess waste.
Color and tone
Use 1/4 tsp astaxanthin per batch for vivid reds and oranges. Combine with spirulina or marigold for balanced tones. Be cautious—too much pigment can darken or shift yellows.
- Keep protein high for growth; tweak fats and minerals by life stage.
- Split batches into grow-out, maintenance, and breeder blends—label clearly and rotate.
- Test small changes and observe activity, spawn readiness, and color before scaling up.
- Lean on salmon and mild white fish trimmings for natural oils and texture variety.
Nutritional Principles Behind the Mix
Start by calculating dry-weight protein so each batch meets your target (commonly 55–65% for growth-focused omnivores/carnivores). Below is a simple method to estimate your batch protein percentage.
How to calculate protein % (example): measure protein grams in each ingredient and estimate dry weight. Example: a 55 g can of a particular canned salmon may list 13 g protein; if the can is ~60% water, dry mass ≈ 22 g and protein/dry ≈ 13/22 ≈ 59% (example numbers vary by brand). Use labeled nutrition facts from your exact products for accuracy.
Balancing fat, fiber, and minerals
Keep fats moderate. Energetic oils support activity and hormones, but excess fat increases waste and worsens water quality. Include small amounts of vegetable fiber (peas, zucchini) to aid digestion. Whole ingredients supply minerals — bones in canned salmon add calcium and phosphorus naturally. If algae and greens are present, skip redundant vitamin mixes; too many supplements can be wasteful or harmful.
“Efficient protein that gets eaten means less leftover nutrients and clearer tanks.”
- Use marine meat and fish fillets for clean amino profiles.
- Match texture to digestibility so animals extract nutrition without fines that cloud the tank.
- Watch body condition, activity, and color, then tweak fats or algae on the next batch.
What to Avoid and What to Swap
Small changes to the ingredient list prevent big problems in the tank and keep appetite high. Choose swaps that protect clarity and health while preserving nutrition for your community.
Skip spinach and strong brassicas
Avoid fresh spinach and heavy brassicas (kale, broccoli, cauliflower, cabbage) in regular mixes. These can be slow to digest for many aquarium species, may reduce acceptance, and in some cases contribute to water-quality issues if uneaten.
When in doubt, opt for milder plant matter that fish readily accept.
No garlic or heavy sauces
Don’t rely on garlic or strong seasonings as an appetite booster — aquaculture research and practical experience show mixed results, and sulfurous additives can make blends less palatable. Keep sauces, sugary glazes, and heavy seasonings out of your fish food recipe; stick to clean, raw ingredients designed for aquatic diets.
- Swap in algae: spirulina or chlorella powders for color, micronutrients, and digestion support.
- Mild veg: zucchini, peas, or green beans instead of strong terrestrial greens.
- Use marine protein: whole meats like salmon, white fish, or shrimp with measured binders rather than starchy thickeners.
“When an ingredient creates odd smells or film, remove it and return to the proven core.”
Storage, Labeling, and Food Safety at Home
A thoughtful storage system turns a weekend batch into weeks of quick, reliable dinners. Plan packaging and labeling so each thaw is predictable and each serving supports tank health.
Scoop finished portions into zip‑top bags, press flat, and freeze. Thin slabs freeze quickly, reduce freezer space, and break off clean portions you can grab during a busy evening.
Flatten in labeled bags for fast break-off portions
At feeding, break off a small piece and thaw it in a serving cup with tank water. Stir after ten minutes so particles separate and disperse evenly. Avoid microwaving prepared portions — it alters texture and can concentrate fats.
Mark particle sizes and species targets to rotate variety
Clearly mark each bag with date, particle size (coarse, fine, puree), and the target fish. With good labeling and rotation, a single batch can feed multiple tanks for several weeks; store at freezer temperatures (ideally -18°C / 0°F) and use older batches first.
“Press slabs thin, label them well, and thaw only what you need — it saves time and protects water quality.”
- Press slabs thin for fast freezing and consistent portions in the kitchen freezer.
- Use a clean cup of tank water to thaw small amounts before dinner.
- Portion only what will be consumed quickly to protect water quality and freezer inventory.
- Keep raw and prepared items separate; follow standard home safety for seafood handling and wash surfaces well.
- Reserve utensils and cutting boards to avoid cross-contamination and off-odors.
Track outcomes: note texture, acceptance, and clarity on each label so future batches match real needs. With a short prep checklist you’ll wrap up in minutes and have reliable protein portions on hand, ready when it’s feeding time.
Feeding Routine, Portions, and Tank Practices
A predictable feeding routine keeps tanks clear and livestock healthy. Set a short, consistent schedule so meals finish quickly and monitoring becomes simple. Small changes at dinner time prevent large nutrient swings and reduce maintenance.
Feed what they eat in five minutes
Aim to feed only what is consumed within five minutes. If food remains after that window, reduce the next portion. This habit protects water and reduces nuisance algae growth.
Pause return flow during feeding
Turn off the return pump for a few minutes while feeding so pellets and bits stay in the display and not the sump or skimmer. This keeps food where the mouths are and reduces waste.
Thawing: use a small cup with tank water
Thaw frozen portions in a single cup of tank water. After about ten minutes, stir briefly so pieces separate and spread evenly. Target-feed shy or slow grazers after the main group clears to reduce competition.
“Feed only what clears in five minutes; consistency reduces stress and nutrient spikes.”
- Deliver multiple small servings for dense communities.
- Keep a towel and dedicated tools ready for neat, fast service.
- Document your schedule and portion sizes so others can replicate care during absences.
Water Quality, Ramp-ups, and Live Foods
Introduce supplements and live prey slowly so your system and stock adjust without a crash.
Prevent nutrient spikes: increase feeding in small steps and test water frequently. A practical ramp is: 1/8 dose → 1/4 after two days → 1/2 after two more days → full dose. Pause and test ammonia/nitrite/nitrate at each step; this staged approach helps avoid sudden algae blooms and stress.
For filter feeders, dose phytoplankton every other day—it should look dark green and smell clean. If it ever smells sour, discard it. Shake bottled phyto daily so cells stay suspended; home-grown phyto has a shorter shelf life (about a month) and also needs regular shaking.
- Live enrichment: hatch baby brine shrimp as an occasional booster—hatch time is temperature-dependent but commonly ~24–72 hours (about 48 hours at moderate temperatures).
- Practical guide: a small community reader reported using about 1 cup of prepared feed for a 55‑gallon system as a feeding reference—adjust volumes to your tank, filtration, and livestock.
- Gentler approach: split new or richer feeds across the day if you want a milder introduction that protects clarity.
“Keep a log of doses and test results; stability and clear water show you’re on the right track.”
Pair occasional live prey with your protein-rich staple at dinner to boost activity and encourage natural foraging. Small, steady changes save time and maintain healthy tanks in minutes.
Time and Cost Wins You Can Feel
Stretch your budget and save time by buying smart and batching once. A single afternoon in the kitchen converts bulk seafood into labeled slabs that make dinners ready in minutes.
Asian market seafood mixes and bulk buys
As an example (prices vary by region and date): a 1 lb frozen mixed seafood pack (shrimp, squid, mussel, etc.) at some markets can cost around $3.50/lb, compared with about $10/lb for deli medleys. Use local prices as your guide and treat this as an illustrative comparison.
Prepping “ready minutes” batches that last weeks
Process semi‑frozen mixes, flatten into zip bags, and label by particle size. One reader’s batch fed three tanks daily for over a month with no daily prep—your mileage will vary by portion size and species.
- Source smart: mixed bags with shrimp and squid stretch dollars further and add variety.
- Batch once: a single session yields weeks of ready‑to‑thaw portions for many aquariums.
- Rotate: alternate lean fillet blends with occasional salmon or shrimp-rich batches to balance fats and flavors.
- Label & store: prioritize freezer space and rotate older batches first to avoid freezer burn.
“Measure savings in time and stable routines as much as dollars.”
Quick Variations and Flavor Boosts Fish Love
Small, targeted extras—like nori clips or a mysis treat—keep dinners interesting without adding work. These micro-variations are quick to prepare and help maintain appetite across community tanks.
Practical add-ons that work
Clip half a sheet of nori to a rock or clip for tangs and other grazers a couple times a week. Offer frozen mysis shrimp as a high-acceptance treat for many community fish and LPS corals. For picky mouths, use a target-feeding tool (e.g., a “Mandarin Diner”).
Mango‑style accents and simple sauces
Introduce tiny mango or vegetable “salsa” accents sparingly—just a sprinkle to add novelty. Avoid sugary or starchy sauces that can upset digestion and foul the water.
- Add nori on clips for natural grazing between main feedings.
- Work in mysis as an occasional booster for midwater species and corals.
- Supplement with quality pellets or a small bit of crushed accepted food for target feeding.
- Prefer astaxanthin or spirulina boosts over heavy sauces for color and nutrition.
- Rotate themed micro-batches (herbivore-forward, breeder-rich, growth-focused) and label each slab for quick use.
“Change one variable at a time so you can tell what truly makes a difference.”
Conclusion
Build a repeatable workflow that turns one afternoon of prep into weeks of ready portions. Use the frozen processor mix or the high-protein gel method to create balanced batches that thaw in minutes and feed your aquarium reliably.
Quick-start recipe (1-line): 1 lb canned salmon + 1–2 oz spirulina + 1.5 oz gelatin dissolved in 1 cup hot water → blend, spread thin, freeze → thaw small pieces in a cup of tank water when feeding. (Adjust for species and portion size.)
Store thin, labeled slabs in the freezer, thaw small pieces in a cup of tank water, and pause return flow at feeding so portions stay in the display. Feed only what the fish consume within five minutes to protect water clarity and reduce maintenance.
Keep ingredients clean and species-appropriate: avoid spinach, strong brassicas, and heavy sauces. Watch activity, color, and clarity, then tweak the next batch. Scale and rotate blends to keep variety effortless.
Celebrate the gains: more control over food, healthier stock, clearer water, and extra time enjoying your tank—achievable with a simple, refineable recipe you can share.
