Aquarium CO2 Systems: Boost Plant Growth & Fish Health

Healthy planted tanks start with balance. Aquatic plants need two basics: light and carbon. When those factors are out of sync, algae can take over and ruin the look and function of a planted aquarium.

Injecting carbon helps plants grow fuller and bushier. It lets plants outcompete algae for nutrients and gives hobbyists more predictable results than hoping plants “take off.”

This buyer’s guide will define what an aquarium co2 system is, compare real-world options, and explain essential parts. You’ll learn how to match a setup to tank size, goals, and budget.

The core promise: when light, carbon, and nutrients work together you get better plant growth, steadier nutrient uptake, and clearer algae control. This approach works for low-light community tanks and high-demand aquascapes if tuned responsibly.

Fish and shrimp safety stays front and center. We also cover price honestly—upfront cost versus refill value—so you can buy once and enjoy long-term stability.

Key Takeaways

  • Aquarium CO2 Systems.
  • CO2 supports stronger, bushier plant growth and reduces algae pressure.
  • Learn system types, parts, and how to size a setup for your tank.
  • Both low-light and high-light tanks can benefit when tuned correctly.
  • Prioritize fish and shrimp safety while optimizing performance.
  • Consider upfront cost and long-term refill value before buying.

Why CO2 Changes Everything in a Planted Aquarium

A measured boost of dissolved carbon changes how plants grow and how tanks behave.

Carbon fuels plant metabolism. When plants get steady co2, they photosynthesize faster and use nutrients more efficiently. That fuels denser stems, stronger roots, and richer coloration.

Stronger, fuller plant growth that outcompetes algae

Plants use more carbon than any other element they need. Give them access and they sprout thicker leaf mass and vigorous pearling. Better plant growth reduces free nutrients and starves algae.

Healthier tank balance when light, CO2, and nutrients align

Think of success as a triangle: light, carbon, and nutrients. Too much light without carbon, or carbon without nutrients, creates imbalance and invites algae.

  • Stable co2 beats high bubble rates for predictable results.
  • Consistent carbon dosing improves nutrient uptake and lowers waste.
  • Healthier plants make the entire aquarium cleaner and more stable.

Focus on stability, not extremes. Small, steady inputs keep plants thriving and tanks calm. That reliable rhythm is what turns a planted aquarium into a living, balanced display.

Who Should Buy a CO2 System (and Who Should Wait)

Deciding whether to add a pressurized carbon source depends on your goals, tank style, and willingness to monitor conditions.

Low-light tanks that want steady growth: Low light plus a gentle co2 injection often yields predictable, forgiving results. Plants grow slower but fuller, and carpets can establish without triggering algae when tuned carefully.

High-demand aquascapes chasing carpets and vivid coloration

High light, dense planting, and aggressive trimming push plants fast. Those setups become carbon-limited quickly unless a reliable co2 tank and regulation are in place.

Signs your aquarium is carbon-limited

Watch for stalled new growth, pale leaf tips, unexplained algae despite fertilizers, or plants that never fill in. These are practical clues that co2 levels need attention.

Who should wait: New or unstable tanks, or hobbyists unable to check parameters regularly, should stabilize lighting, filtration, and nutrients first. When the symptoms match, added carbon is often the missing lever that unlocks the aquascape you pictured.

Aquarium CO2 Systems: Types Compared for Real-World Use

Choosing the right delivery path affects reliability, cost, and daily maintenance.

Pressurized cylinder systems

Best for stability and long-term growth. A pressurized set gives steady output and scales with larger planted tanks. It suits hobbyists who want consistent results and fewer interruptions.

Disposable cartridge setups for small tanks

Compact and low up-front cost. Disposable co2 cartridge kits work well for nano tanks and temporary projects. Be honest: ongoing cartridge cost and limited run time make this a short-term choice for many.

Single-cylinder, multi-tank setups using manifolds

Smart for multiple displays or fish rooms. One co2 cylinder feeding several aquariums via a manifold reduces refill frequency and saves money over time. It needs careful pressure balancing and tubing routing.

“Pick the option that matches your cabinet space, refill access, and how ‘set-and-forget’ you want the experience to be.”

  • Consider cabinet size and cylinder transport.
  • Factor refill convenience and monthly running cost.
  • Match the set-up to your planted goals to avoid upgrading twice.

The Core Parts of a CO2 System (What Each Component Does)
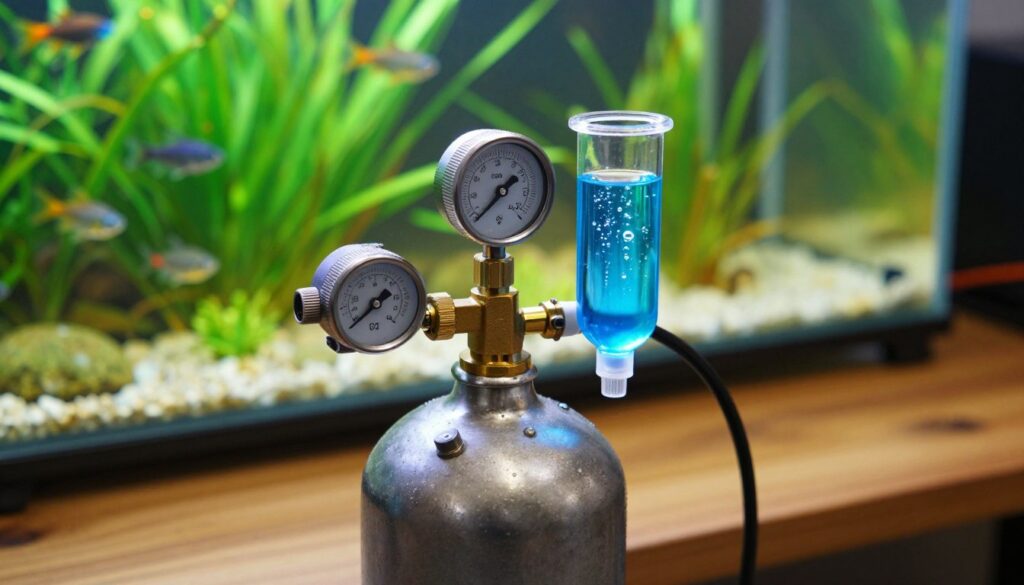
A detailed close-up view of the core parts of a CO2 aquarium system, including a CO2 tank, regulator, bubble counter, and diffusers, arranged neatly on a wooden workbench. The CO2 tank is polished metal, reflecting light, with a brass regulator attached, showcasing intricate gauges and knobs. The bubble counter is transparent glass, filled with vibrant blue water, displaying bubbles rising slowly. Soft, natural lighting enhances the textures of the components, creating a warm and inviting atmosphere. In the background, a blurred aquarium is visible, filled with lush green plants and colorful fish, subtly illustrating the purpose of the CO2 system. The scene conveys a sense of professionalism and expertise in aquarium setup.

A clear grasp of every component lets you pick gear that lasts and runs without constant tinkering.

CO2 cylinder and common sizes

The cylinder sets how often you’ll refill. Small tanks use compact bottles for convenience. Larger displays benefit from 5 lb or bigger tanks to lower refill frequency and keep output steady.

Regulator basics and working pressure

The regulator controls output pressure so your diffuser gets a steady flow. Higher working pressure matters for fine-mist atomizers and some inline devices.

Dual stage vs single stage

Dual stage regulators hold a consistent output as tank pressure drops, which helps end-of-tank stability. Single stage units cost less but can drift near empty.

Solenoid and timed automation

A solenoid pairs with a timer to switch injection on and off. Automation saves mistakes and syncs carbon with the light cycle.

Needle valve and bubble counter

Use a needle valve for precise adjustment and a bubble counter for visual confirmation of flow. Bubble size can vary by device, but the counter gives a repeatable baseline.

Diffusers, inline options, and reactors

Pick an in-tank diffuser for simplicity, an inline CO2 diffuser for cleaner looks, or a reactor for high-efficiency dissolution. Each balances efficiency, aesthetics, and complexity.

Check valve, tubing, and monitoring

Install a check valve to prevent backflow and protect the regulator. Choose co2 resistant tubing to reduce leaks and hold fittings securely.

Tools like a drop checker act as training wheels while you learn timing and saturation. Together, these parts turn a confusing list into a reliable setup.

Choosing the Right CO2 Cylinder Size for Your Tank

Picking the right cylinder size makes your planted display simpler, steadier, and cheaper to run. Start by matching realistic runtime to your routine before you shop for a bottle.

For a typical 40-gallon tank, a 5 lb CO2 cylinder will last about 3–4 months at a sensible injection rate. That translates to roughly under $5 per month when you spread refill price over time.

Why go bigger? Larger bottles (20 lb+) cut the effective monthly price because refill labor and service fees stay similar while volume rises. Fewer refills mean fewer interruptions to plant growth and steadier levels week to week.

  • Measure first: check cabinet height, cylinder diameter, and add room for the regulator.
  • Transport: choose a size you can safely move; many U.S. shops will refill or exchange common bottle sizes.
  • Ask questions: confirm local refill price and turn-around time to weigh convenience versus sticker price.

Long-term, pick the largest bottle that fits your space and you can carry. That small step makes CO2 feel effortless instead of a constant chore.

Regulator Buying Guide: Pressure Control, Gauges, and Reliability

Understanding how a regulator reads and delivers pressure is one of the fastest ways to stop guessing and start growing reliably.

Reading the two gauges: cylinder vs output

Most regulators have two gauges. One shows the cylinder’s internal pressure and the other shows the working or output pressure delivered to your tubing.

The cylinder gauge uses high PSI markings and tells you how much gas remains. The output gauge reads much lower and shows the set delivery pressure you will actually use.

Matching working pressure to your diffuser atomizer

Different diffuser atomizer designs need different working pressures. Ultra-fine membranes and some inline atomizers demand higher pressure to make a steady mist.

Check the device specs and set the regulator so the output pressure matches that range. Too little pressure = uneven bubbles. Too much can waste gas and stress fittings.

When to prioritize a dual stage regulator

Dual stage regulators keep output steady as cylinder pressure falls. That stability matters when you want fewer daily tweaks and consistent plant performance.

If you run a high-demand setup, or you dislike end-of-bottle drift, prioritize a dual stage unit. It’s often the best budget trade-off for long-term confidence.

  • Learn to read gauges to spot normal vs abnormal pressure behavior.
  • Match working pressure to your diffuser atomizer for a steady mist.
  • Pay more for a reliable regulator to reduce micro-adjustments and sudden swings.

Diffusers, Atomizers, and Reactors: Getting CO2 into the Water Efficiently

The method you use to dissolve gas into water often determines real-world gains. Choose the delivery device with both result and look in mind. Small changes at the point of diffusion alter plant uptake, algae pressure, and visual clutter.

In-tank diffuser vs inline atomizer for cleaner aesthetics

In-tank diffusers are simple to set and tune. They sit inside the display and give predictable mist near their placement. That makes initial setup beginner-friendly.

Inline atomizers hide behind the filter outlet and keep the display minimal. When matched to flow and placement, an inline co2 device can dissolve gas more efficiently while staying out of view.

Efficiency vs complexity: why inline setups need more tuning

Inline equipment and a small reactor often demand higher working pressure and precise alignment with filter flow. Expect more tuning, but also better dissolution when done right.

Replacing worn parts to maintain fine mist

Ceramic discs clog with time and lose finesse. Replacing the head restores the fine mist that makes a diffuser atomizer effective.

“The last mile of diffusion decides plant response and color.”

For example, the replacement ceramic for the Atomic Stainless CO2 Diffuser is MSRP $12.99 and fits 25cm, 30cm, 35cm, and 40cm units. Swapping that disc is an inexpensive way to regain peak performance.

  • Tip: Match mist size, placement, and circulation so plants across the tank benefit.
  • Tradeoff: Better efficiency often equals more tuning and higher pressure needs.
  • Maintain: Replace ceramic parts before performance drops.

Must-Have Accessories That Make CO2 Injection Safer and Easier
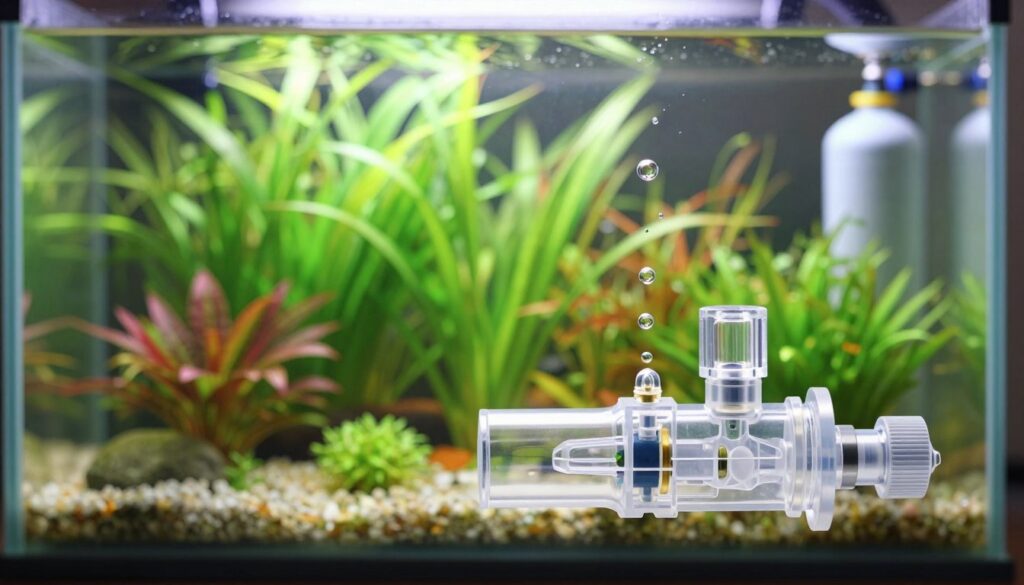
A detailed illustration of a check valve used in aquarium CO2 systems, prominently placed in the foreground. The check valve, made of clear plastic, features intricate internal mechanisms that demonstrate its functionality, with bubbles rising through it to indicate CO2 flow. In the middle ground, an elegantly arranged aquarium filled with lush, vibrant plants showcasing healthy growth due to effective CO2 injection. The background captures a soft-focus of aquarium equipment, like a diffuser and CO2 tank, bathed in natural sunlight filtering through. The lighting is bright and inviting, enhancing the colors of the plants and providing a serene atmosphere. The image should be clean and professional, without any text or distractions, emphasizing the utility and importance of the check valve in enhancing aquarium health.

The right extras turn a complicated gas setup into something you can trust every night. Small parts cut risk, save time, and let you enjoy steady plant growth without constant checks.

Where to place a one-way valve

Install a check valve between the bubble counter and the diffuser so tank water cannot flow back toward the regulator or solenoid when the system shuts off. Place it with the arrow pointing toward the tank.

Bubble counter placement and consistency

Mount the bubble counter where you can read it easily—either on the regulator or inline near the cabinet wall. Keep its orientation steady and fill it to the same mark each time for consistent co2 bubble tracking.

Why upgrade to CO2 resistant tubing

CO2 resistant tubing is thicker and stiffer than air line tubing. It seals tighter at fittings and resists gas creep, which reduces leaks and extends service life.

  • Small accessories matter: check valve, a clear bubble counter, and resistant tubing give big confidence.
  • Use counters as a consistency tool: bubble size varies—don’t treat the counter as the final authority.
  • Build a sleep-well setup: these upgrades lower maintenance, cut risk, and protect power and regulator gear overnight.

Budgeting for CO2: Price Ranges, Refill Costs, and Long-Term Value

Budget planning turns a great planted display from a hobby expense into a predictable monthly line item.

Real ownership costs split into two buckets: upfront gear and ongoing refills. A decent regulator and solenoid cost more, but they keep levels steady and reduce midnight tweaks.

For a 40-gallon tank, smart sizing can push refill costs to less than $5 per month. Choosing a larger co2 cylinder or co2 tank reduces refill frequency because labor and service fees dominate refill pricing.

Price often signals build quality. Pay extra for a solid regulator and a reliable bubble counter. Spend on leak-resistant tubing and a durable diffuser; skimp on cosmetic extras if needed.

  • Upfront: good regulator, solenoid, and durable diffuser are worth the spend.
  • Ongoing: larger cylinders lower monthly refill cost and save time.
  • Balance: avoid “cheap now, expensive later” traps by valuing long-term reliability.

“A stable setup costs more at first but pays back in plant growth and fewer surprises.”

Recommended CO2 Setups by Aquarium Size and Planting Style
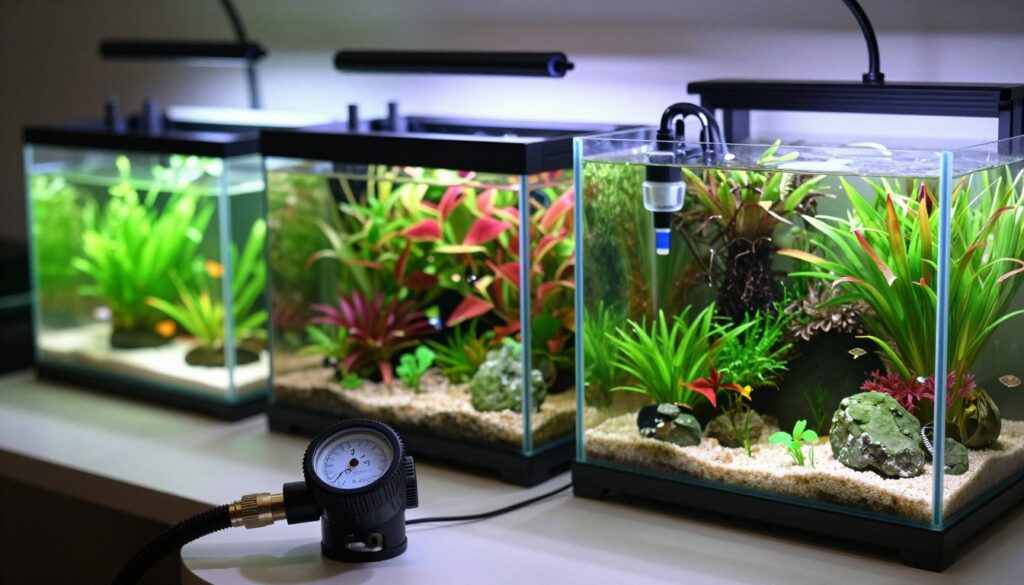
A beautifully arranged aquarium showcasing various CO2 systems tailored for different sizes and planting styles. In the foreground, include a detailed close-up of a high-quality CO2 regulator with a bubble counter, highlighting its intricate components. The middle ground features three distinct aquariums: a small tank with low-light plants, a medium tank flourishing with vibrant flora, and a large aquascape filled with diverse aquatic vegetation. Each tank should have interconnected CO2 diffusers visible. In the background, soft, diffused lighting creates a serene atmosphere, enhancing the lush greenery. Use a slightly elevated angle to capture the entire scene, evoking a sense of tranquility and showcasing the importance of CO2 systems in promoting plant growth and fish health in aquariums.

Choose the right setup by matching tank footprint, plant demand, and how much time you want to spend tuning.

Below are compact, ready-to-buy recommendations so you can skip analysis paralysis and order gear that fits your goals.

Nano planted aquarium: compact, simple CO2 injection

For tanks under 10 gallons, pick a compact diffuser and a small, low-pressure regulator kit. Aim for gentle co2 injection and an adjustable needle valve so tuning stays safe for fish and shrimp.

  • Small diffuser + bubble counter
  • Mini regulator or cartridge option
  • Co2 resistant tubing and a check valve

Mid-size community tanks: balanced growth with stable CO2 levels

For 10–40 gallon aquariums, choose a reliable co2 system with a solenoid and timer. This supports steady growth while keeping fish comfort front and center.

  • Medium regulator with bubble counter
  • Inline atomizer or quality ceramic diffuser
  • Drop checker for learning and consistency

Larger aquariums: leveraging cylinder size for better cost efficiency

For >40 gallon displays, prioritize a larger co2 cylinder and a dual-stage regulator to reduce refill frequency and stabilize output. Higher light and dense planting demand stronger dissolution—consider a reactor or inline atomizer.

  • Co2 cylinder sized to your cabinet for lower long-term price
  • Dual-stage regulator, solenoid, and quality diffuser/reactor
  • Plan for service access and future scale

“Pick a setup that gets you the look you want in six months, not just what fits today’s budget.”

How to Set Up a CO2 System Correctly the First Time

Start your installation with a calm, checklist-driven approach so every joint and valve is correct from day one.

Attach the regulator the right way

Use the working O-ring on the regulator seat. The O-ring creates the seal between the regulator and the co2 cylinder. Do not wrap plumber’s tape on that threaded joint—tape can prevent the O-ring from seating and cause a leak.

Safe first-open and solenoid behavior

Open the cylinder valve slowly. The cylinder pressure gauge should jump when the bottle is opened. If you have a solenoid, remember: it blocks gas when unpowered. Only when the solenoid has power will gas reach the rest of the line.

Route tubing for tidy service and clear flow

Run tubing from the regulator to the bubble counter first, then onward to the diffuser or inline device. Keep tubing neat along cabinet walls so service and swaps are easy. Add a check valve between counter and diffuser to protect the regulator from backflow.

Confirm bubble flow and pressure

With the solenoid powered and the needle valve opened slightly, watch the bubble counter for steady, regular bubbles. Normal looks like consistent bubble size and rhythm. If bubbles are erratic, recheck the regulator and tubing path.

Leak test every joint

Soapy water is your best early-warning test. Spray or brush it on every connection: regulator threads, tubing fittings, the bubble counter, and diffuser joints. Large bubbles mean a leak—tighten or reseat the O-ring and test again.

  1. Attach regulator with O-ring; no plumber’s tape.
  2. Open bottle slowly; watch cylinder gauge rise.
  3. Power solenoid to allow flow; confirm bubbles in counter.
  4. Route tubing regulator → bubble counter → diffuser; tidy runs.
  5. Leak test all joints with soapy water; fix any large bubbles.

When done carefully, the payoff is huge: a confident first setup gives months of stable growth and far fewer late-night fixes. For a deeper walkthrough and gear picks, see our complete CO2 setup guide.

Dialing In CO2 Levels Without Guesswork
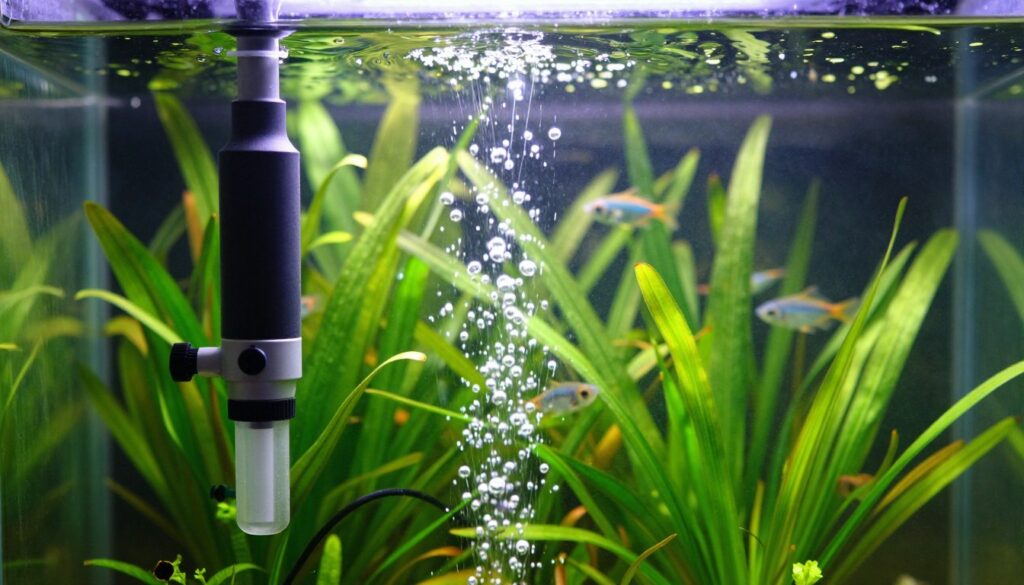
A vividly detailed aquarium environment showcasing CO2 levels being monitored for optimal plant growth and fish health. In the foreground, a high-tech CO2 diffuser releases fine bubbles into the water, creating an ethereal effect. The middle ground features lush aquatic plants thriving in vibrant greens, illuminated by soft, natural light filtering through the water. The background includes a serene underwater landscape with small fish swimming gracefully among the plants, enhancing the sense of a balanced ecosystem. Use a shallow depth of field to focus on the diffuser and plants, while the fish appear slightly blurred. The overall mood is tranquil and harmonious, embodying the essence of a well-maintained aquarium.

Dialing gas delivery into a planted display is less guesswork and more gradual tuning when you use simple, measurable checks.

Target range and what “good” looks like

A practical target is 25–35 ppm. That range fuels stronger growth without pushing gas into unsafe territory for most fish and shrimp.

Using the pH-drop method

Measure baseline pH, then run injection until the pH shows roughly a one-point drop at peak saturation. That single-point drop is a reliable benchmark for many planted setups.

Starter bubble guidance and safe adjustment

  • Starter rule: about 1 bubble per second per 20 gallons (≈1 bubble/sec per 50 L).
  • Use a bubble counter for a repeatable baseline; bubble size varies, so confirm with tests.
  • Adjust slowly—small moves only—so livestock stay comfortable.

Expect lag time

Changes can take hours to fully register. Patience is a tool: wait before making more adjustments so you don’t overshoot.

Tools to learn faster: a drop checker and a clear bubble counter help you build confidence and turn measurements into steady, repeatable tuning.

Timing CO2 Injection with Your Lights for Peak Plant Growth

Start each lighting cycle with dissolved carbon already available so plants hit peak photosynthesis right away.

Begin CO2 injection about 2–3 hours before lights come on. Saturation takes time and plants burn most carbon in the first light hours. Giving the water a head start feeds growth during peak demand.

Starting CO2 2–3 hours before lights come on

Use an automatic timer and solenoid to switch gas on early. That automation ensures consistent pre-light saturation and removes daily guesswork.

When to shut off CO2 before lights-out

Turn injection off about one hour before the lights go out. This reduces overnight oxygen stress for fish and lets surface exchange recover after the final photosynthetic drop.

Aligning photoperiod length with stability and algae control

Many tanks run lights and CO2 for roughly eight hours daily. Beginners worried about algae can start at six hours and grow to 10+ hours as the tank matures.

“When CO2 and light align, your planted display becomes predictable and grows with intention.”

  • Sync timers so gas leads the lights by 2–3 hours.
  • Stop injection one hour before lights-off for safety.
  • Use shorter photoperiods during the learning phase to limit algae pressure.

Fish and Shrimp Safety: Preventing Too Much CO2
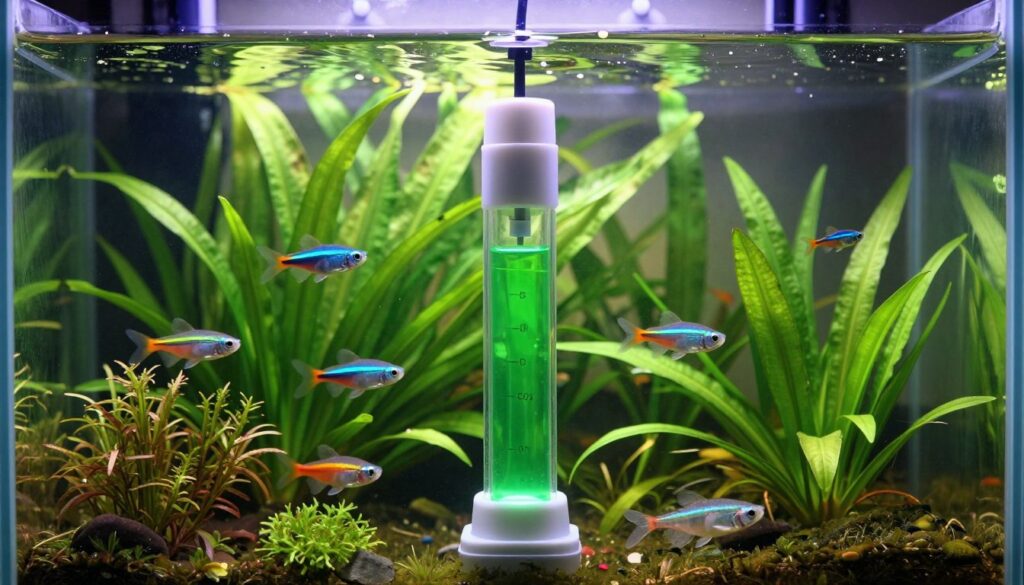
A detailed drop checker device, prominently displayed in the foreground, is filled with bright green liquid to indicate optimal CO2 levels for aquarium plants. The middle ground features lush aquatic plants, including Anubias and Java fern, thriving in a beautifully aquascaped aquarium. Colorful neon tetra fish and a peaceful shrimp are swimming nearby, suggesting a safe environment. The background contains soft-focused aquarium equipment and ambient lighting that mimics the natural underwater feel, creating a serene atmosphere. The overall mood is calming and informative, with gentle sunlight filtering through the water, enhancing the vibrant colors of the fish and plants, conveying a sense of health and balance in the aquarium ecosystem.

Keeping fish and shrimp safe starts with simple engineering: good surface exchange and steady circulation. These two factors cut the risk of low oxygen pockets and make the whole tank more forgiving when levels need fine-tuning.

Surface exchange and circulation as your best protection

Open, moving water is your first line of defense. Keep the water surface clear of film and direct filter outflow to encourage gas swap. Strong, well-placed circulation prevents CO2 layering and helps oxygen reach all corners.

Use a return or wavemaker to create gentle flow across the surface. Aim for full turnover that reaches plant zones and hiding spots so animals never sit in stagnant water.

Stocking tips: when to add animals in a CO2-injected tank

Add fish and shrimp when the injection is off or after a fresh water change. That gives livestock time to acclimate as CO2 rises with the next cycle.

What too much gas looks like: rapid gasping at the surface, listless behavior, or group clustering near high-oxygen areas. Prevention beats reaction—fix flow and surface exchange first, then reduce dosing.

  • Practical checks: use a drop checker during the first weeks to learn normal ranges.
  • Shrimp note: many shrimp thrive with modest injection; they tolerate higher dissolved gas when the system is stable.
  • Confidence tip: steady circulation and clear surface exchange let plants and animals thrive together.

“A safe CO2 setup isn’t about fear—it’s about building a stable system where plants and animals thrive together.”

Maintenance and Troubleshooting for Long-Term Stability

Long-term stability comes from a short checklist repeated monthly and at each refill. Small, steady habits stop most problems before they start and keep plants and animals safe.

Refill cadence: A typical co2 cylinder lasts a few months depending on injection rate and bottle size. Bigger bottles lower refill frequency and improve monthly price by spreading service costs over longer runs.

Common leak points: valves, tubing, and fittings

Check valve seats, regulator threads, and tubing ends first. Use soapy water on each joint to spot leaks early.

When bubbles drop: clogged diffusers and pressure mismatches

If bubbles slow or stop, inspect the diffuser for mineral buildup. Then verify working pressure and seals on the needle valve and fittings.

Keeping your setup clean, hidden, and cabinet-friendly

Use co2 resistant tubing to prevent slow leaks and stiffen runs. Route lines neatly, secure the bubble counter where it’s easy to read, and keep the bottle accessible for safe refills.

“Most issues are simple checks: seals, tubing, and the diffuser — not mystery failures.”

  • Set realistic expectations: tune once, check monthly.
  • Prioritize resistant tubing and tight valve seals.
  • When in doubt, follow a step-by-step leak and pressure check before changing parts.

Conclusion

Choose gear that matches your goals: bold growth, clean looks, or the safest environment for fish and shrimp.

Match intention to parts: prioritize a dependable co2 regulator (dual stage for steady output), an efficient diffuser, and leak-resistant or resistant tubing to keep performance consistent.

Think beyond upfront price. Consider refill frequency, long-term price, and how much time you want to spend tuning and maintenance.

Precision wins: stable injection, timed solenoid control, and gradual adjustments produce the healthiest, most reliable planted results.

Next step: pick a setup sized to your tank, install carefully, test every joint for leaks, and dial in slowly. With patience, your aquascape will reward you daily.

FAQ

What does adding CO2 do for a planted tank?

Adding controlled CO2 boosts plant photosynthesis, producing stronger, fuller growth that outcompetes algae. When light, carbon, and nutrients align, plants absorb more nutrients and display richer color and denser leaf mass.

Who should install a pressurized cylinder setup versus a disposable cartridge?

Choose a pressurized cylinder for mid to large aquascapes and long-term cost efficiency. Disposable cartridges suit nano tanks or beginners testing the benefits with minimal upfront cost.

How do I pick the right cylinder size?

Match tank size and runtime. A 5 lb tank often serves a 40-gallon system for months between refills. Larger cylinders reduce refill frequency and long-term cost, but check cabinet fit and local refill options.

Why do regulators have two gauges, and which matters most?

One gauge shows cylinder pressure (how full the tank is). The other shows output or working pressure (what the regulator delivers). Read both to monitor tank level and ensure your diffuser or reactor gets suitable delivery pressure.

When should I choose a dual-stage regulator?

Choose dual-stage when you want steady output as cylinder pressure falls. Dual-stage regulators reduce output fluctuation and improve end-of-tank stability for precise dosing.

Inline atomizer or in-tank diffuser — which is better visually and in efficiency?

Inline atomizers keep the display cleaner and often deliver efficient dissolution in canister-return setups. In-tank ceramic diffusers give fine bubbles but require maintenance and can show inside the display.

How important is a solenoid and timer for my setup?

A solenoid tied to a timer automates injection with your photoperiod, saving gas and preventing nighttime overdosing. It’s essential for consistent daily cycles and safe operation.

What is a needle valve and why do I need one?

A needle valve gives fine control over bubble rate and flow, letting you dial in delivery without fiddling with the regulator’s main control. It’s key for precise, repeatable adjustments.

How do I measure safe CO2 levels for fish and shrimp?

Aim around 25–35 ppm as a standard target. Use drop checkers or reliable test kits, monitor fish behavior, and ensure good surface exchange and circulation to protect livestock.

What is the pH-drop method and when is it useful?

The pH-drop method tracks pH change when CO2 is added to estimate ppm. A one-point drop after CO2 stabilizes often aligns with effective dosing; use it together with drop checker checks for safety.

How should I route tubing and place the bubble counter and check valve?

Route tubing from the regulator to a bubble counter before the diffuser. Install a check valve between the bubble counter and diffuser to prevent backflow into the regulator. Keep tubing short and secured to reduce leaks.

What tubing should I use to avoid damage and leaks?

Use CO2-resistant tubing rather than standard airline tubing. Resistant lines withstand high pressure and dissolved gas exposure, reducing permeability and softening over time.

How often should I expect to refill a cylinder?

Refill cadence depends on cylinder size and bubble rate. Small tanks on cartridges may need monthly swaps; a 5 lb tank on a gentle rate often lasts several months between refills.

What common maintenance keeps a system reliable?

Check seals and O-rings, test joints for leaks with soapy water, replace worn ceramic discs or atomizer parts, and verify solenoid and timer function. Clean and inspect tubing annually for brittleness.

Why does my diffuser stop producing fine bubbles even though gas flows?

Clogs and calcium buildup reduce diffusion. Clean or replace ceramic discs, check for pressure mismatches from the regulator, and ensure tubing isn’t kinked or partially blocked.

How should I time CO2 with my lights?

Start CO2 about 2–3 hours before lights-on to let levels stabilize, and shut it off about 30–60 minutes before lights-out. Matching photoperiod and dosing reduces algae risk and supports steady growth.

Can too much CO2 harm fish or shrimp, and how do I prevent it?

Excessive CO2 lowers oxygen and can stress livestock. Prevent this with proper circulation, surface agitation, conservative initial dosing, and monitoring with drop checkers or test kits.

Are bubble counters necessary or just cosmetic?

Bubble counters provide a visual flow reference and help estimate consumption, but they don’t measure ppm. Use them alongside drop checkers and observation to tune delivery precisely.

What safety checks should I perform when first assembling a pressurized setup?

Ensure the O-ring seal on the regulator is seated, avoid plumber’s tape on regulator threads, test all joints for leaks, power the solenoid safely, and confirm steady bubble flow before leaving the system unattended.

How do costs compare between DIY cartridge options and full pressurized rigs?

Disposable cartridges lower upfront spending but increase long-term cost per month. Pressurized rigs require higher initial investment but yield better refill economics, especially with larger cylinders and frequent use.

What brands and real-world parts should I consider for reliability?
Consider reputable regulators like Victor or CO2 Art for stability, quality ceramic diffusers from ADA-style vendors, and CO2-resistant tubing from established hobby suppliers. Choose components with clear warranties and replacement parts.
Coral Beauty Angelfish Care
Coral Beauty Angelfish Care: Tips for a Thriving Aquarium
Centropyge bispinosa is a compact, colorful dwarf from the Pomacanthidae family that rewards steady attention....
Aquarium Plants Turning Brown
Aquarium Plants Turning Brown? Here's What to Do
Seeing discolored leaves can feel alarming, but this signal is usually solvable. Most tanks recover quickly...
Algae Control
Effective Algae Control for Marine Aquariums
Maintaining a healthy aquarium can be demanding, especially when managing unwanted algae growth. Algae...
Easy Freshwater Fish
Top Easy Freshwater Fish for Beginners
Fishkeeping brings joy and calm into your home, but choosing the right fish makes all the difference. Rather than one single “best fish for beginners,” the best choice depends on your goals, tank size, and how much time you want to spend on care. Many easy freshwater fish — from peaceful rasboras and schooling tetras to hardy bettas — offer vibrant color and friendly behavior that brighten any room and fit a wide range of beginner setups. Plenty of low maintenance freshwater fish are both tough and colorful, making them ideal first pets for new aquarists. This guide highlights easy freshwater species that tolerate beginner mistakes, show interesting behaviors, and work well in community or single-species tanks. With the right starter tank and simple routine care, these species help make the fishkeeping hobby rewarding and stress-free. Getting Started with Freshwater Fishkeeping New aquarists usually want fish that are hardy, attractive, and forgiving of small errors. Pick species that match your tank size and experience — for instance, small schooling fish like rasboras or tetras for planted community tanks, or a single betta for a small, peaceful display. Choosing the right species up front reduces surprises and makes learning basic aquarium care easier. Whether you want a tranquil community aquarium or a colorful centerpiece, these beginner-friendly choices will help you enjoy the hobby from day one. Scroll down to see recommended species, simple care steps, and a starter checklist to choose the right tank. Key Takeaways: Choose species that fit your tank size and time — this makes the hobby easier to manage. Beginner-friendly fish like rasboras, tetras, and platies tolerate a range of conditions and are forgiving for novices. Low maintenance freshwater fish provide color and movement without complex care routines. Start with a stable tank setup and regular water checks to prevent common issues. Deciding on a community or single-species tank up front helps you pick compatible fish and reduce stress. Follow the species-specific care notes below and you’ll build confidence quickly in this rewarding hobby. Getting Started with Freshwater Fishkeeping Starting your freshwater fishkeeping journey is exciting — especially when you choose beginner-friendly fish species that match your space and schedule. These easy care fish make the hobby rewarding without a steep learning curve. The first step is to pick the right aquarium and plan for minimal-care routines that keep water stable and fish healthy. The Appeal of Low Maintenance Aquariums Low maintenance aquariums are ideal for beginners because they deliver visual impact with a manageable routine. A larger tank (20 gallons or more) is often recommended as a starter because it provides greater stability in water chemistry and temperature, which makes simple freshwater fish care easier. Bigger tanks lessen the risk of rapid parameter swings that stress fish. Popular Types of Beginner Friendly Fish Species Choosing the right fish reduces surprises and keeps the hobby enjoyable. Hardy, easy-keep species include small schooling fish (rasboras and tetras), livebearers (platies), bottom-dwellers (corydoras), and single-display options like bettas. Goldfish are hardy too, but remember they have different size and filtration needs than tropical aquarium fish — pick the species that match your tank size and long-term plans. For a quick reference on starter fish types, see this beginner fish tank fish guide: beginner fish tank fish. Understanding Simple Freshwater Fish Care Keeping a healthy tank requires a few essential tools and a basic routine. Key items include a reliable filter, an appropriately sized heater for tropical setups, a test kit to monitor ammonia, nitrite, and nitrate, and a dechlorinator/water conditioner. Tropical community fish commonly do well around 76–79°F (78°F is often cited as a general target), while coldwater species such as common goldfish prefer cooler ranges. Lighting should mimic a natural day/night cycle — roughly 8–10 hours is a good starting point for planted aquariums, adjusted per plant needs. Critically, cycle your tank before adding fish to establish the nitrogen cycle (beneficial bacteria that convert ammonia to nitrite and then nitrate). Test water regularly during cycling and until levels stabilize. Regular partial water changes (10–25% weekly or biweekly depending on stocking) and monitoring keep conditions safe for fish and plants. Fish SpeciesLifespanTemperature (°F)Care Level Goldfish Up to 20 years (varies by type) 60–75 Medium (high waste production) Betta 2+ years (often 3–5+ with good care) 76–82 Low–Medium Cichlids Up to 15 years (species dependent) 75–80 High Neon Tetras 2–6 years 72–78 Low Basic equipment examples and rough price ranges to get started: a hang-on-back filter ($20–$60), an adjustable aquarium heater ($15–$40), a liquid test kit ($10–$30), and a good water conditioner ($5–$15). Adding live or hardy plants and natural decorations helps create shelter and reduces stress for community fish. Follow these starter steps: choose a tank size that fits your goals, set up and cycle the tank, add a small group of compatible easy-to-keep fish, and maintain a simple cleaning and testing routine. If you want a ready checklist, check the beginner equipment guide and start your setup checklist to avoid common early mistakes when creating your first freshwater aquarium. Discover the Hardy and Vibrant Rasboras Starting your journey in easy freshwater fishkeeping often leads hobbyists to rasboras. These small schooling fish are easy to care for, add bright colors and movement, and perform well in planted, low-maintenance aquariums. Harlequin and Lambchop Rasboras: Nano Fish Wonders The Harlequin and Lambchop rasboras are prized for their hardiness and compact size — typically around 1–2 inches at maturity. They prefer slightly acidic to neutral water (roughly pH 6.0–7.0) and a temperature range near 72–82°F. Offer a varied diet of high-quality flakes, micro-pellets, and occasional frozen foods to keep colors bright and health strong. Minimum Care with Maximum Impact in a Community Tank Rasboras shine in groups, so plan for a school (six is a minimum; 8–10+ is more natural) to encourage comfortable, natural behavior. A planted 10–20 gallon tank with gentle filtration, open swimming space, and hiding spots (floating or stem plants) is an ideal starter setup. They’re peaceful community members and pair well with other small, nonaggressive species such as small tetras and pygmy corydoras. Monitor water quality to prevent common issues like Ich and fin rot; maintaining stable parameters and avoiding overcrowding are the best prevention steps. Rasboras are excellent for beginners who want colorful, schooling fish that are easy to keep and suit a range of simple community tank setups. Why Common Goldfish Make Great Starter Pets Common goldfish are a classic choice for beginners because they’re hardy, personable, and can thrive in both outdoor ponds and indoor aquariums when given the right space and care. However, “easy” is relative: goldfish grow fairly large and produce a lot of waste, so planning for their adult size is essential for long-term success. The Resilience of Carassius auratus Common goldfish (Carassius auratus) are appreciated for their calm temperaments and long potential lifespans when cared for properly. Many varieties can live a decade or more, and some individuals reach up to 15–20 years in excellent conditions. Depending on the variety, mature lengths commonly range from several inches to a foot or more, so expect growth over months and years. Outdoor Ponds and Indoor Tanks: The Versatility of Goldfish Goldfish can do well in both indoor tanks and outdoor ponds, but requirements differ. Ponds give many varieties the room to truly thrive and often require less frequent tank moves, while indoor aquariums need strong filtration and regular maintenance to handle their higher bioload. Goldfish TypeAverage LifespanLengthMinimum Tank Size Oranda 15–25 years 8–12 inches 20–50 gallons (juvenile); larger as adult Comet 5–14 years 4–12 inches 50+ gallons or pond Ryukin 10–15 years Up to 10 inches 30–50 gallons Start goldfish in a larger tank than you might for tropical community fish — a 20-gallon can work for a young single common goldfish, but you should plan to upgrade as it grows. Key care points: high-capacity filtration (rated well above tank volume), more frequent partial water changes (often weekly), and attention to dissolved oxygen and temperature. Monitor ammonia and nitrite closely, as goldfish produce significant waste. Keeping common goldfish teaches long-term care and planning: they reward owners with personality and longevity but require commitment to appropriate tank size and filtration. If you’re unsure about indoor space, a properly designed outdoor pond is an excellent alternative for many goldfish varieties. Picking the Perfect Tetras for Stress-Free Fishkeeping Starting your aquarium journey can feel overwhelming, but stress-free fishkeeping is very achievable with low-upkeep tetras. These easy freshwater fish species are colorful, peaceful, and great for beginners when kept in appropriate groups and a stable environment. Simple daily and weekly care routines let these schooling fish thrive in a calm, planted aquarium. Neon and Cardinal Tetras: A Rainbow in Your Aquarium The vibrant neon tetra is famous for its bright blue stripe and red tail area, while the cardinal tetra displays an even more extensive red band. Both are popular beginner-friendly tetras, and they make a striking focal point when kept in schools. Aim for at least 6–10 individuals (more for larger tanks) so they display natural schooling behavior and feel secure. With consistent care, some tetras can live several years; typical lifespans vary by species and conditions. For schooling and comfortable swimming, a planted tank and a minimum of 10 gallons is a starting point for a small group — larger tanks are better for big schools and a peaceful community tank. Good filtration helps keep water clear and safe for aquarium fish. Tetras as the Ideal Choice for Novice Aquarists Tetras are an excellent pick for novice aquarists because their basic needs are straightforward. Key setup points: soft to slightly acidic water for many tetra species (though needs vary), stable temperature, gentle flow, plenty of plants for cover, and regular partial water changes. Feed a varied diet of high-quality flakes or micro-pellets with occasional frozen treats to maintain health and color. Recommended group size: 6–12+ depending on tank size and species. Typical temperature range: generally around 72–78°F for many neon and cardinal tetras (confirm species-specific needs). Substrate & plants: fine substrate with floating and stem plants creates preferred dimmer, planted conditions. Compatible tankmates: peaceful community fish such as small rasboras, pygmy corydoras, and small livebearers — avoid large or fin-nipping species. Using the right aquarium cleaning tools and keeping an eye on water parameters makes maintenance easy for beginners. Choose the tetra species that match your local water conditions (some like cardinals prefer softer water), start with a modest-sized school, and you’ll have a lively, low-stress freshwater aquarium that’s very beginner-friendly. Corydoras: The Active and Amiable Bottom-Dwellers Corydoras catfish (commonly called cory catfish) are lively, social bottom-dwellers that make excellent additions to community tanks. They forage along the substrate, help tidy up uneaten food, and add entertaining activity as a small, peaceful catfish species ideal for beginners. Feeding Your Cory Catfish for Optimal Health Feeding corydoras well means offering sinking foods they can reach easily: quality sinking pellets or wafers, occasional frozen or live treats (bloodworms, daphnia), and vegetable matter. Feed small amounts once or twice daily so food reaches the bottom and doesn’t foul the water; remove excess to keep ammonia low. For more on nutrition and tank health, see optimal nutrition for bottom dwellers. The Social Habits of Different Corydoras Species Corydoras are true schooling fish — they feel safest and show their best behavior in groups (aim for at least 6 individuals; pygmy species often do better in slightly larger groups). Popular beginner-friendly species include the Bronze Cory, Bandit Cory, and Pygmy Cory, each with slightly different size and temperature preferences. They thrive on soft, fine substrate (sand or smooth rounded gravel) to protect their delicate barbels and appreciate plenty of hiding spots like caves and dense planted areas. Provide gentle water flow, good oxygenation, and stable water parameters — many corys prefer moderate to slightly cooler temperatures compared with tropical midwater species. Do and Don’t quick list: Do use fine sand or smooth substrate to prevent barbel damage. Do keep cory catfish in groups (6+), and offer sinking foods. Do provide shaded areas and hiding spots with plants or décor. Don’t use sharp gravel or aggressive tankmates that may harass them. Don’t overfeed — excess food raises ammonia and harms bottom tank health. Adding corydoras to a community tank brings useful bottom-cleaning behavior and lively group dynamics. With proper substrate choices, suitable food, and kept groups of their own kind, cory catfish are one of the most rewarding easy-to-care bottom dwellers for beginner aquarists. Platies: Colorful and Easy Care Fish for Beginners Platies are classic easy-care platies and popular low maintenance livebearers that bring bright color and friendly activity to beginner aquariums. These hardy aquarium fish are forgiving of small mistakes, breed readily in home tanks, and help new hobbyists learn about fish behavior and basic tank management. Variatus platies and several other varieties are excellent starting choices. Livebearers and Their Simple Reproductive Habits Platies are livebearers, which means females give birth to free-swimming fry rather than laying eggs. A healthy female can produce dozens of fry in a single brood (many sources list typical broods in the 20–50 range, though numbers vary by individual and conditions). Broods can appear frequently if conditions are favorable, so plan for population control if you don’t want many juveniles in the main tank. To improve fry survival, provide plenty of hiding places—dense plants, breeding grass, or breeding traps—and consider a separate rearing tank or mesh breeder box if you want to raise fry. For beginner-friendly fry food, offer infusoria or liquid fry foods at first, progressing to microworms or finely crushed flakes as they grow. Variatus Platies: A Hardy Choice for New Enthusiasts Variatus platies are robust, colorful, and tolerant of a range of water conditions, making them well-suited to new keepers. They typically reach 1–3 inches and can live several years in good conditions (many live up to around five years). They accept a varied diet—flakes, pellets, freeze-dried and frozen foods—and thrive in water roughly between 70–82°F with moderate hardness. CharacteristicValue Typical Size 1–3 inches Lifespan Up to ~5 years (varies) Cost per Fish $2–$4 Grouping Recommendation Keep groups with at least 2–3 females per male to reduce male harassment Diet Flakes, pellets, freeze-dried and frozen foods Ideal Water Temperature 70–82°F Water Parameters pH 6.8–8.5, GH 10–28 dGH (tolerant) If you enjoy breeding, platies make it easy to observe the full life cycle, but be prepared for rapid population increases. If you prefer not to raise fry, options include separating sexes, rehoming fry, or keeping more females than males. These simple management steps help maintain a balanced aquarium without overwhelming new keepers. Overall, platies and variatus platies are among the most forgiving, colorful, and engaging species for beginners—easy to keep, fun to watch, and a solid choice to start your aquarium journey. Betta Fish: The Crown Jewel of Beginner Aquariums Betta fish are prized for their vivid colors and flowing fins, and they’re a popular choice for beginners who want a striking, low-footprint centerpiece. While bettas are relatively easy to care for, meeting their basic needs—appropriate tank size, stable water, and compatible tank mates—keeps them healthy and displays their best colors and behavior. Creating the right betta fish habitat is central to success. A 5-gallon tank (or larger) is a far better home than a tiny bowl: it provides room to swim, more stable water conditions, and space for gentle filtration and plants that reduce stress and showcase color. Betta Fish Tank Mates and Habitat Requirements Choose calm, non-fin-nipping tank mates to avoid stress and torn fins. Good companions include small corydoras, peaceful small tetras (only some species — research compatibility), and small snails or shrimp where appropriate. Avoid obvious fin nippers and large, aggressive species. Keep water pH around 6.8–7.4 and temperature in the 76–82°F range for most bettas; consistency is more important than small fluctuations. Maintain regular partial water changes to prevent ammonia buildup and keep conditions healthy. Note on plecos: many pleco species grow large; if you want a “pleco” buddy, choose a small, dwarf species and confirm adult size first. Caring for Your Betta: Practical Tips and Tricks Feed your betta a varied diet of high-quality pellets formulated for bettas, supplemented occasionally with freeze-dried or frozen treats like bloodworms or brine shrimp. Avoid overfeeding — one to two small feedings per day is usually sufficient. Good practical betta fishkeeping includes a gentle filter and an adjustable heater to keep water temperature stable. Bettas possess a labyrinth organ that lets them breathe surface air, but this does not replace the need for clean, oxygen-rich water and proper filtration. Provide plants (live or silk), hiding spots, and open swimming areas to create a comfortable environment. Betta quick facts: Recommended tank size: 5–10 gallons for a single betta. Temperature: 76–82°F (stable is key). pH: ~6.8–7.4. Diet: pellets + occasional frozen/live treats. Tank mates: small, peaceful species only; avoid fin-nippers and overly active fish. For a sample beginner community setup, consider a 10-gallon tank with one betta, a small group of pygmy corydoras (4–6), a few peaceful rasboras or small tetras (6–8 total schooling fish), and plenty of plants for cover. Always introduce tank mates carefully and monitor behavior over time. With the right tank, stable water conditions, and thoughtful companions, betta keeping is an accessible, rewarding entry into the freshwater aquarium hobby—beautiful, expressive fish that respond well to attentive but simple care. Easy to Care for Freshwater Fish: The Social and Active Barbs Active freshwater barbs bring lively movement and bright color to community aquariums. Many barb species are hardy and easy to care for, but keep in mind that some types (like tiger barbs) may nip fins — while others, such as cherry barbs, are far more peaceful and suited to beginner tanks. Creating Harmonious Environments for Barbs and Other Fish Barbs are schooling fish that feel safest and show natural behaviors in groups, so plan for proper group sizes (often 8+ for many barb species). To reduce fin-nipping and tension, keep barbs in larger groups, provide plenty of cover with plants and décor, and pair them with robust, fast-swimming or similarly sized community fish rather than slow, long-finned species. Colorful and Low Effort Fish Care with Barbs If you want colorful, low-maintenance fish, many barbs are a great choice — they tolerate a range of conditions and are generally straightforward to feed and care for. Choose the right variety for your tank: cherry barbs are a calmer option for community tanks, while other barbs need larger groups and room to swim. Fish SpeciesGroup Size for ComfortTank Size (Gallons) Green Neon Tetra 6+ 10+ Pygmy Corydoras 6+ 10+ Serpae Tetras 8–10 15+ Celestial Pearl Danio 10+ 10+ This table highlights that proper group sizes and adequate tank volume are essential for a harmonious community tank. Small schooling fish feel secure and act naturally when kept in sufficient numbers, while barbs and similar active species need space and visual barriers (plants, rockwork) to reduce stress and nipping. Do/Don’t quick tips: Do choose cherry barbs or other peaceful varieties for smaller community tanks. Do keep barbs in groups (8+ where recommended) to minimize aggression. Do add plants and decorations to break sightlines and give hiding spots. Don’t mix barbs with slow, long-finned species that are likely targets for nipping. Don’t understock — small tanks with too few schooling fish increase stress and aggressive behavior. With the right species choice, adequate group sizes, and thoughtful aquascaping, barbs can be an easy-to-care, colorful addition to beginner freshwater aquariums. Conclusion Starting an aquarium can be easy and immensely rewarding when you choose the right fish and set up a stable environment. Pick 2–3 compatible species that match your tank size and experience level, prepare and cycle the tank, then add fish gradually while monitoring water parameters. Species covered here—rasboras, tetras, platies, corydoras, bettas, and common goldfish—are all beginner-friendly when kept under appropriate conditions. Keeping water quality steady is the single most important factor for fish health. For reference, many community tropical species do well in the mid-70s to low-80s°F (e.g., most tetras and rasboras), while zebra danios tolerate a wider range (about 65–80°F) and common goldfish prefer cooler water. Know the preferred temperature and pH for each species you choose and prioritize stability over chasing perfect numbers. Regular partial water changes, routine testing (ammonia, nitrite, nitrate, pH), and a modest maintenance schedule keep your aquarium balanced. Live or sturdy plants improve water quality and provide shelter for community fish; suitable substrate and decorations create natural hiding places for bottom dwellers like corydoras. Starter community example (adjust by tank size): a 20–30 gallon tank can comfortably house a small community such as 8 rasboras, 6 tetras, and 4 corydoras with plenty of plants and open swimming areas. If you want a centerpiece betta instead, choose tank mates carefully (small corys, peaceful rasboras) and keep the betta in a 5–10 gallon setup with good filtration and heater. Quick action checklist: Choose compatible species that fit your tank size and care capacity. Set up and cycle the aquarium before introducing fish. Test water regularly and perform partial water changes as needed. Provide appropriate filtration, heating (for tropical fish), substrate, and plants. Introduce fish slowly, monitor behavior, and keep a simple feeding and cleaning routine. Want more help? Download a beginner checklist, consult local aquarium clubs or stores for species-specific advice, and use reliable resources on tank cycling, water testing, and stocking calculators to fine-tune your plan. With a little planning and steady care, your freshwater aquarium will become a peaceful, colorful hobby that brings long-term enjoyment. FAQ What are the best fish for beginners? Good starter choices include betta fish, neon and cardinal tetras, common goldfish (with appropriate tank/pond plans), rasboras, corydoras, and platies. These fish adapt well to beginner conditions when kept in suitable tank sizes and communities. Why are low maintenance aquariums a good choice for novice aquarists? Low maintenance aquariums simplify equipment needs and routine care, are more forgiving of early mistakes, and let newcomers focus on learning water testing, filtration, and basic fish behavior without being overwhelmed. What types of freshwater fish care should beginners understand? Key topics: choosing an appropriate tank size and filter, cycling the tank to establish beneficial bacteria, regular testing and partial water changes, understanding temperature and pH preferences, proper feeding, and compatible stocking and group sizes for community fish. Can the common goldfish live in an outdoor pond? Yes—common goldfish often thrive in outdoor ponds where they have more room to reach adult size. Indoor goldfish require much larger tanks and stronger filtration due to their high waste production. How should I feed my cory catfish? Cory catfish do best on sinking pellets or wafers supplemented with occasional live/frozen treats (bloodworms, daphnia). Ensure food reaches the bottom and avoid overfeeding to protect water quality. Are betta fish easy to care for? Bettas are relatively easy when given proper tank size (5+ gallons), stable warm water, and a filtered environment. Avoid aggressive tank mates and protect their fins from nippers. What are the benefits of choosing platies for a beginner aquarium? Platies are hardy, colorful, and easy to breed, making them rewarding for beginners. They tolerate a range of conditions and brighten community tanks; manage breeding if you don’t want many fry. What should I consider when creating a community tank with barbs? Barbs can be active and some species nip fins. Choose peaceful varieties (like cherry barbs), keep them in larger groups to reduce aggression, and avoid slow, long-finned tank mates. What kind of tank setup do neon and cardinal tetras require? Neon and cardinal tetras prefer soft, slightly acidic water, plenty of plants, dimmer lighting, and calm water flow. Keep them in schools of at least six (more for a natural display) in a planted freshwater aquarium to reduce stress....
aquarium water quality
Optimize Aquarium Water Quality Tips
Keeping your aquarium water in top shape is key to a healthy environment for your fish. Simple actions—regular...

Leave a Reply

Your email address will not be published. Required fields are marked *

holiganbet güncel girişholiganbet güncelholiganbet girişholiganbetjojobet güncel girişjojobet günceljojobet girişjojobet